Hi guys
We wanted to show you a great project that’s been in planning for the last few months-and also keep you updated as work continues.
The story starts on the Monday after the fourth running of the Slot.it oXigen 24hours, on the Le Mans track in Henley in Arden, organised by my good friend’s Gary Skipp and Alex Jones. The race is one of the very best in the world, in my opinion, and has been getting better and better each year.
For the last two years I have been racing along with Tamar Nelwam, and his Racing for Holland squad. In 2014, we raced the Toyota TS030, which was a 1/24 model, scaled down to 1/32, and in 2015 an Aston Martin DBR9 in the GT class, which was one of the fastest cars overall, but got struck by bad luck, realising we never met the full potential. In 2015, one member of Tamar’s team was Alex Grijpma, and we instantly clicked and got on well. It was his first foray into 1/32 racing, having previously raced 1/24 scale cars, exclusively.
Me and Alex started to discuss during one marshalling stint at the race, of entering our own car in the October 2015 oXigen Suzuka 2000 race, at the Eindhoven Slot Race Club, in Holland. Then a full scale attack on the Henley Le Mans 24hrs in 2016. The first Eindhoven race in 2014 was a total success, and had captured my interest. It really is becoming the rehearsal race for the Henley 24hours.
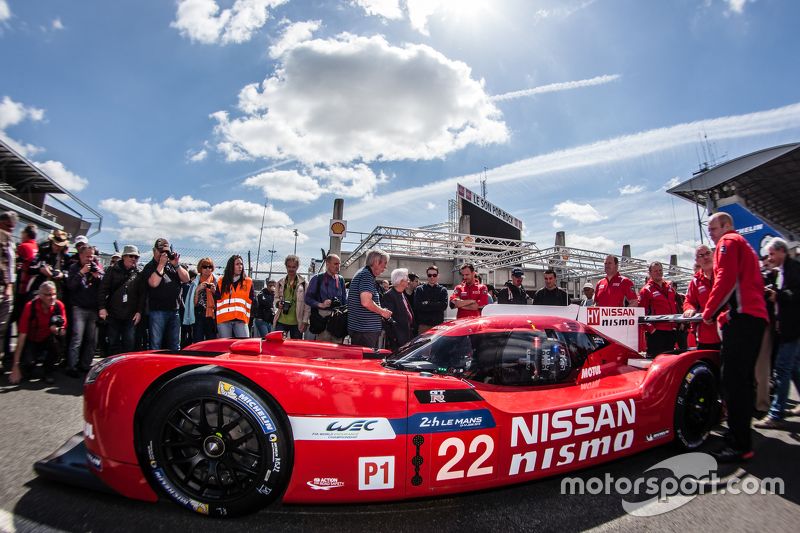
We agreed on the recently announced Nissan GTR-LM Nismo because it is such an interesting car. We even talked about the idea of building a front motored, front wheel drive-spec car, to see if we could mimic the unusual way that Nissan went racing at the real Le Mans in 2015, with varying success.
![]()
This type of left-field thinking is a part of the real Le Mans 24 hours, and is quickly becoming a part of the 1/32 version at Henley. This has been showcased in 3D printed bodies, carbon fibre laminated bodies, and even the prototype version of the newly released Slot.it 4WD system, all being raced, twice around the clock every March.
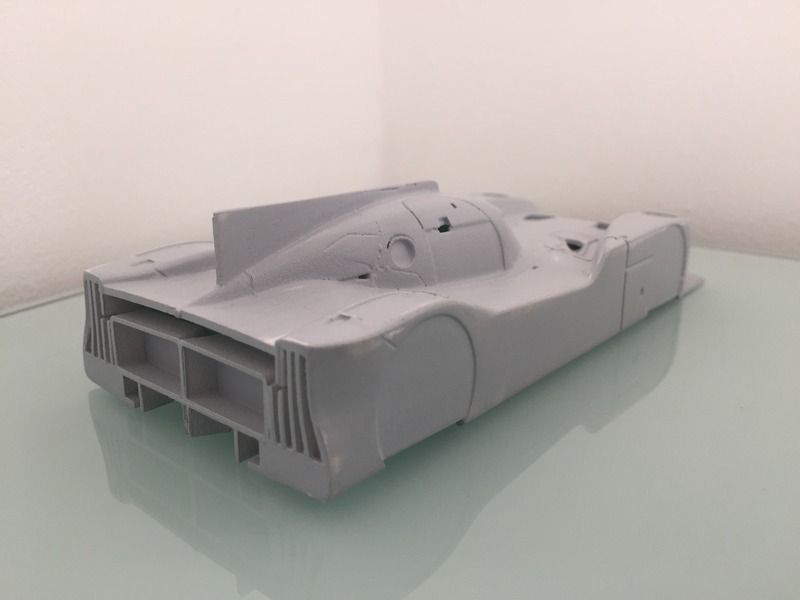
So with the car agreed, we started to think about the body. On the Monday after the race, I purchased some pear-wood, and started to carve a master, in 1.32 scale, using plans I had found on the internet.
However, I then received a FaceTime ‘call’ from another buddy, Fola Osu, legendary 1/24 scale slot car builder, for a catch-up. I mentioned I was working on a Nissan GTR, and low and behold, he turned his phone camera down, to show me a 3D printed Nissan GTR-LM, that he was working on!
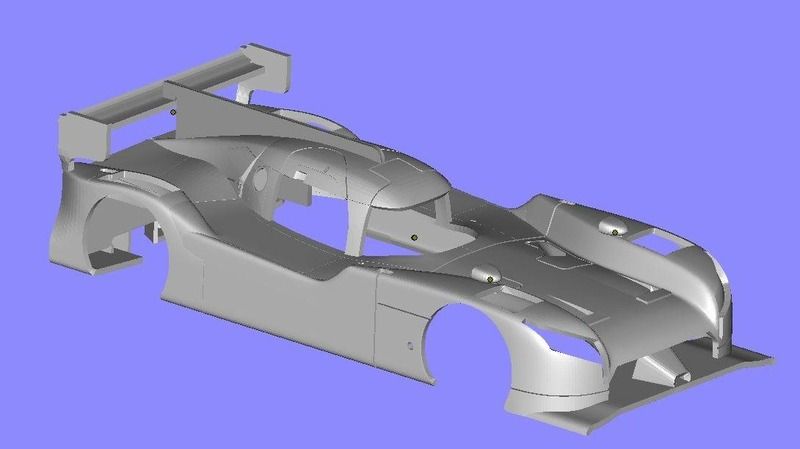
So Fola was interested right from the start, and along with Alexander, we started to put a plan into place, so that we could build this model, and have it ready for the Suzuka 2000. Firstly, we purchased a 3D model from an online company, and after much searching, we stumbled upon the incredibly talented Marco Rizzi, owner of the Area 71 Slotcars brand, who’s models have recently become popular due to their unique selling point, making interesting models, and then making every body on a 3D printer. Each model is then post-processed using a unique technology, which leaves them with a glass-smooth finish, much like a resin of GFK kit.
He agreed after some emails and Facebook messages back and forth, to render our 3D model in his software, scale to 1/32 and then print us a model using his usual techniques, which then we could make a silicone moul, and then laminate bodies in GFK. Soon after, he had the first payment instalment, the 3D files, and he started to work his magic!
![]()
The rendering of the Nissan GTR LM from Marco
Then, we got hit by our first piece of bad luck. Marco sent the first model using the courier GLS, which was accidentally delivered to another customer of his! So Marco quickly printed another master, which was again sent with GLS, and six weeks later it has not arrived! So a word of advice, do not ever use GLS!
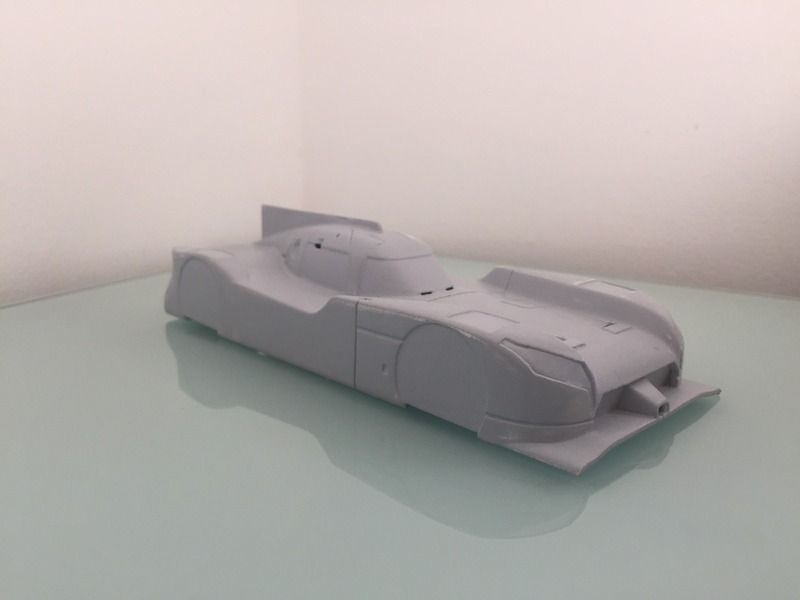
So, Marco printed a THIRD body, and sent it to me using DHL overnight. Unfortunately these delays meant that the master came just two weeks before I was due to leave for Eindhoven! So it was panic stations, and lots of late nights to get the model finished![smile.gif]() .
.
![]()
![]()
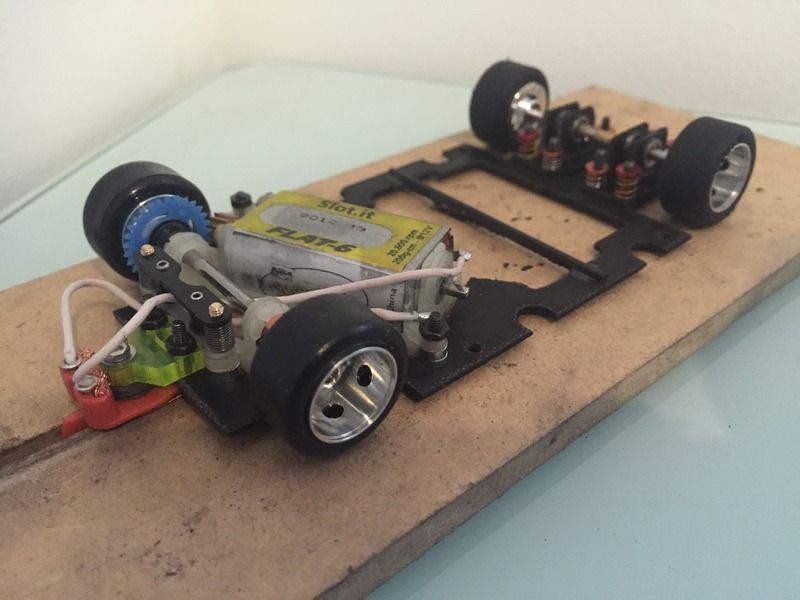
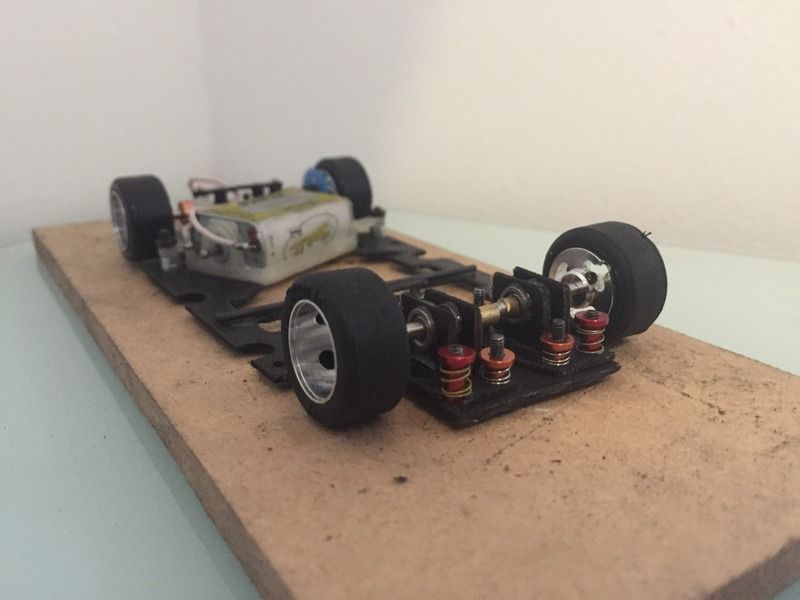
This had a knock on effect with the chassis being cut. I had already designed the chassis for both the front motored, front wheel drive car, and also a more regular rear wheel drive car, using AutoCAD. This was a big challenge for me, having never used this programme before, so I had to learn how to use it, whilst designing the two chassis!
But I wanted to check the measurements of the chassis, when I had the body in my hand, to make sure that everything would fit. Fortunately, everything fitted like a dream, so the designs were sent over to the laser cutter.
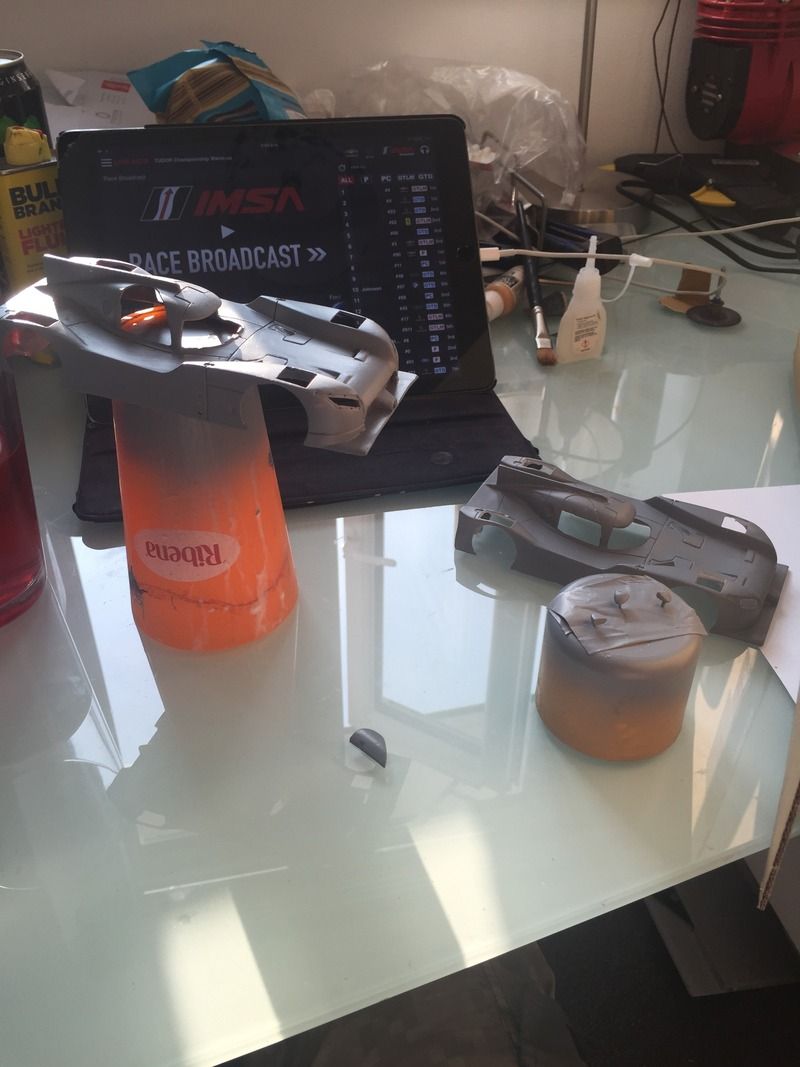
Over the next two weeks, I was a whirlwind of hands, silicone, fibreglass and spray paint! The first job was to prepare the master for moulding. The whole car was given a light sand using 2500 grit wet and dry emery paper, to clean up the odd 3D print mark. Then it was mounted to its moulding plinth, and filler applied to close any gaps such as around the wheel arches, grilles and general indents in the body.
![]()
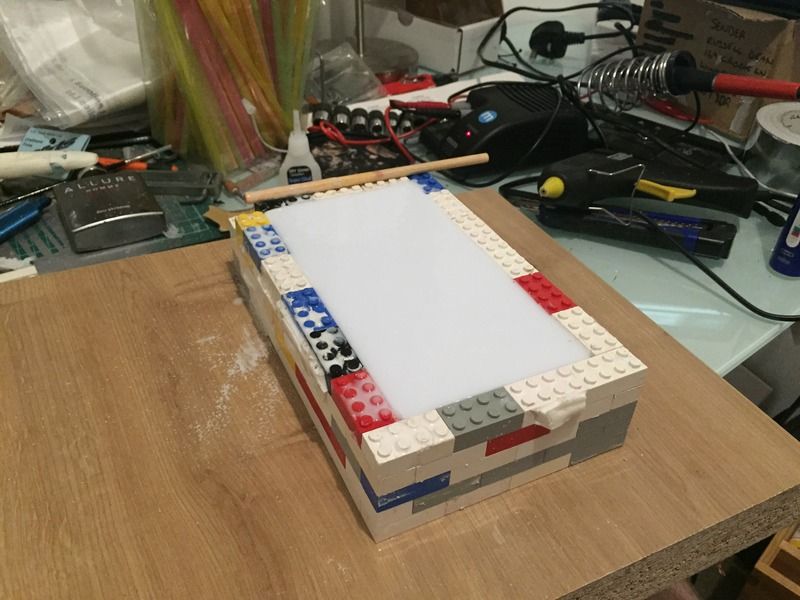
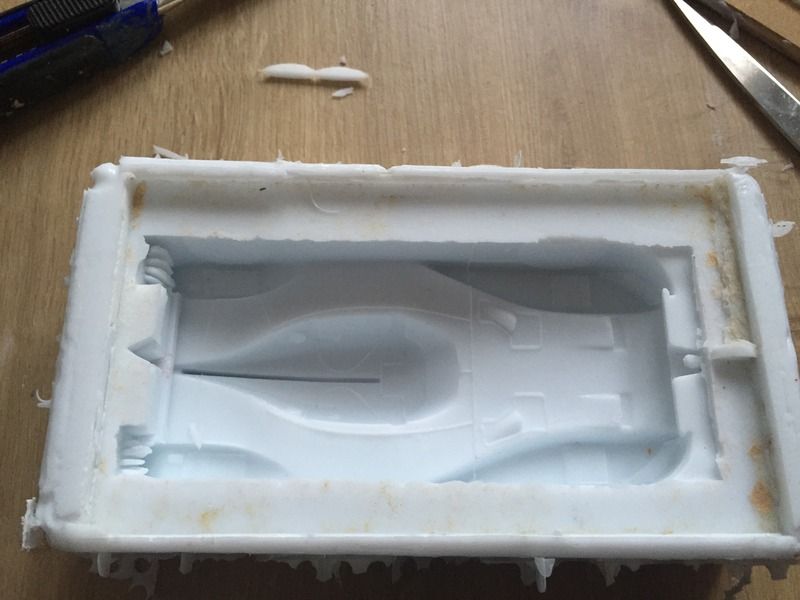
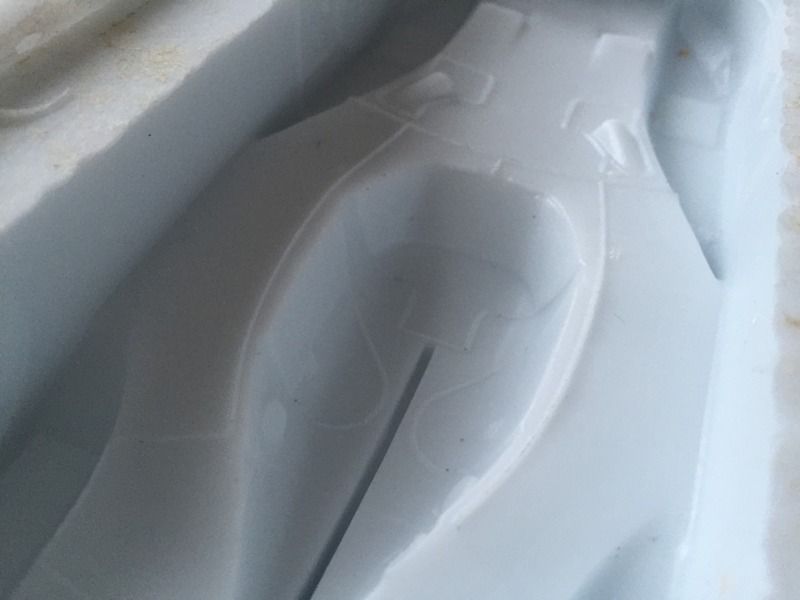
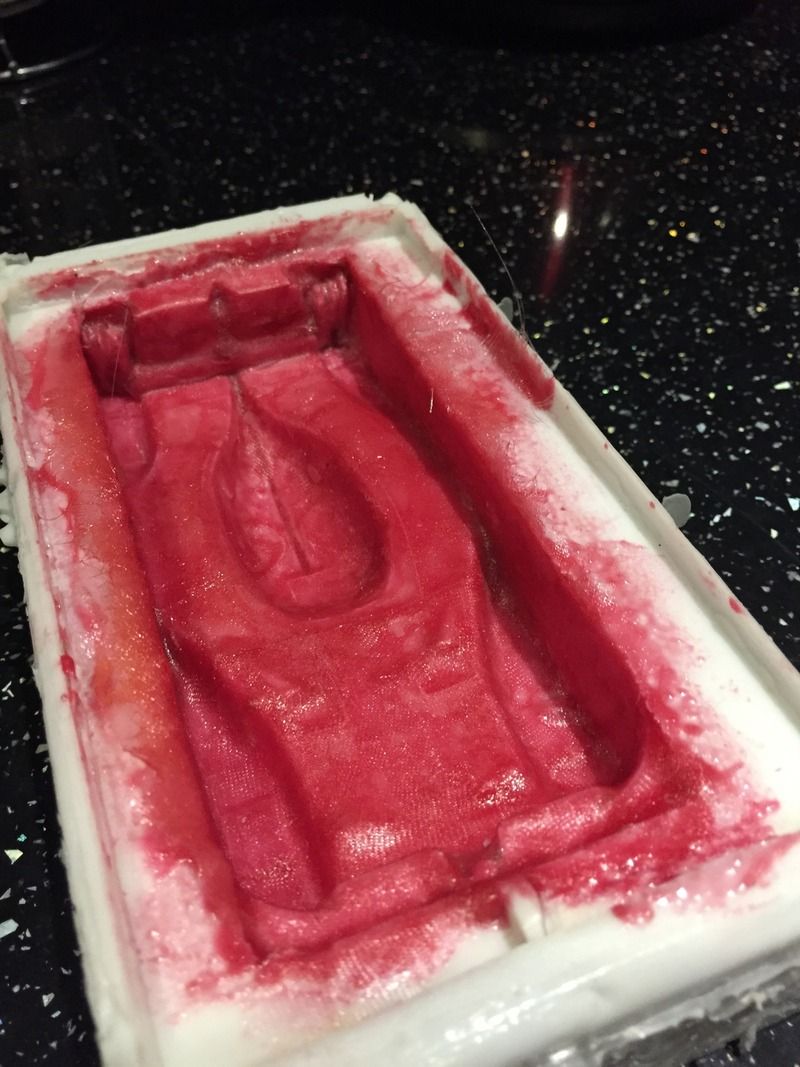
I made a mould box of Lego, to the size of the car. I then mixed the silicone rubber, little at a time, and poured slowly into the mould box. This was left overnight to fully cure, before the demould could take place, and left a perfect mould of the Nissan.
![]()
![]()
![]()
This would be the tricky bit as I had to learn how to laminate a slot car body. A few weeks prior, I had Facetime'd Fola, and he had guided me through the process and recommended the correct products to purchase. These were purchased and I had a few practice runs on another mould I had lying around. I had done a form of laminating with polyurethane resin strengthened with fibreglass on the delicate areas, but a lightweight GFK body was still new.
The first three shells I made weren't the best, and all had to be scrapped. The first I hadn't spread the epoxy resin thick enough (trying to make it light) so there were bits of fibreglass matting showing. The second and third didn't have enough fibreglass matting in, so warped really easily and could not be used.
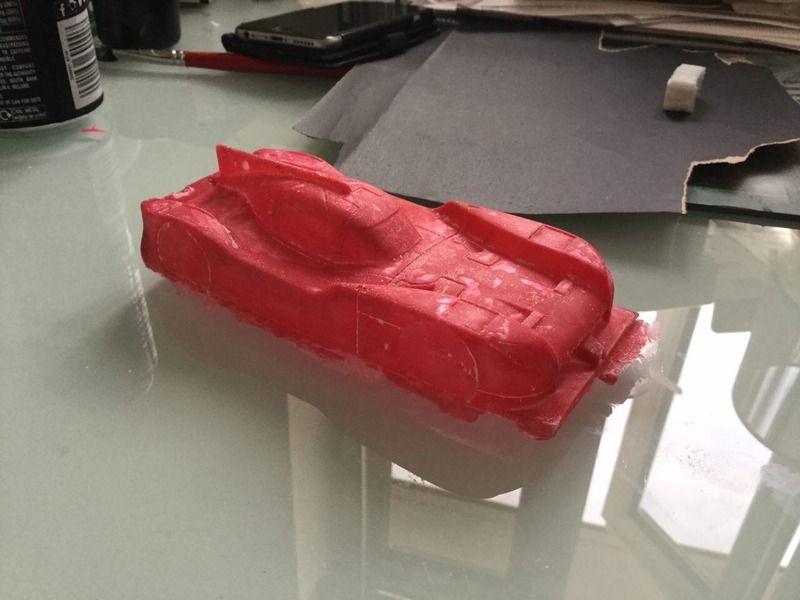
Fortunately, the well known phrase of 'fourth time lucky'.... Came true! This time I managed to get a nice coat of the resin, and enough fibreglass mat laminated, for the body still to have some performance enhancing flex, but strong enough to demould and endure a six hour race.
![]()
So then it was time for clean up. The beauty of using fibreglass means the areas around the glazing can be laminated thinly, so gentle pressure with a scalpel would mean you could remove the excess material very easily, such as around the glazing and wheel recesses.
![]()
![]()
I also drilled the holes for the lights, and also decided to fit real 0.7mm miniature rivets from scale hardware.com. I drilled 35 holes in the body, using a 0.55mm drill bit from a MicroBox, with a pin vice connected to my pillar drill to make sure they'd be straight. Light pressure meant that I didn't break a bit either! I decided to make the drivers door open, so I cut the door out using a sharp scalpel and light pressure.
![]()
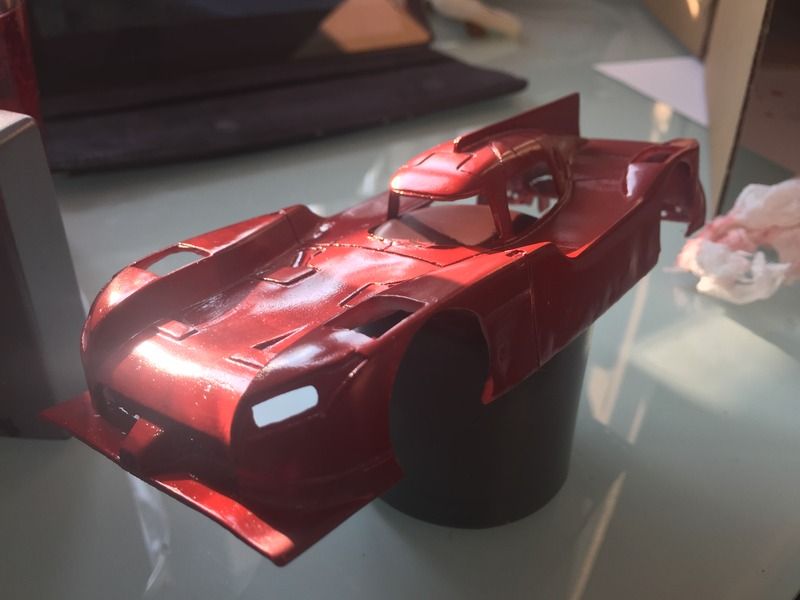
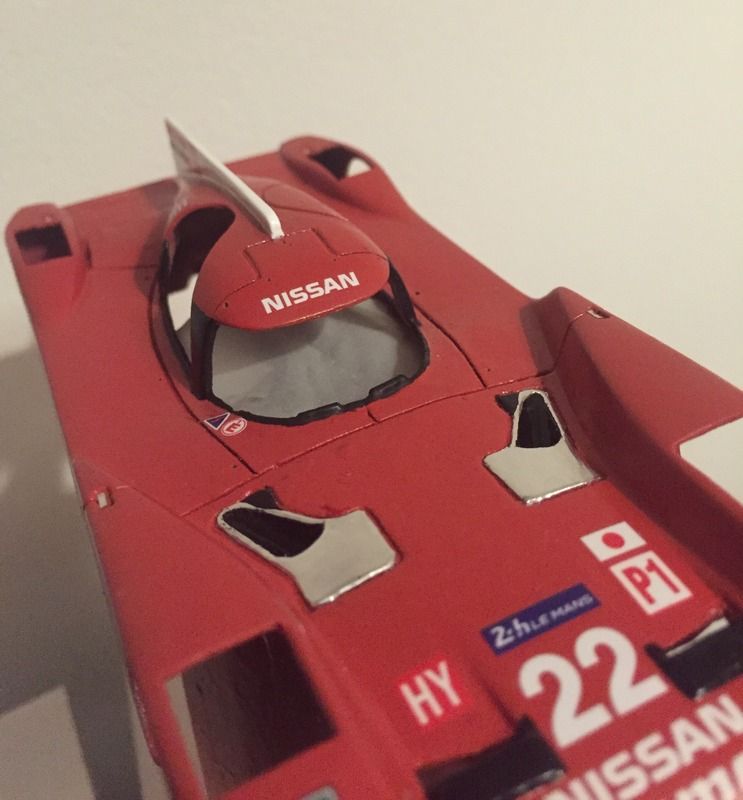
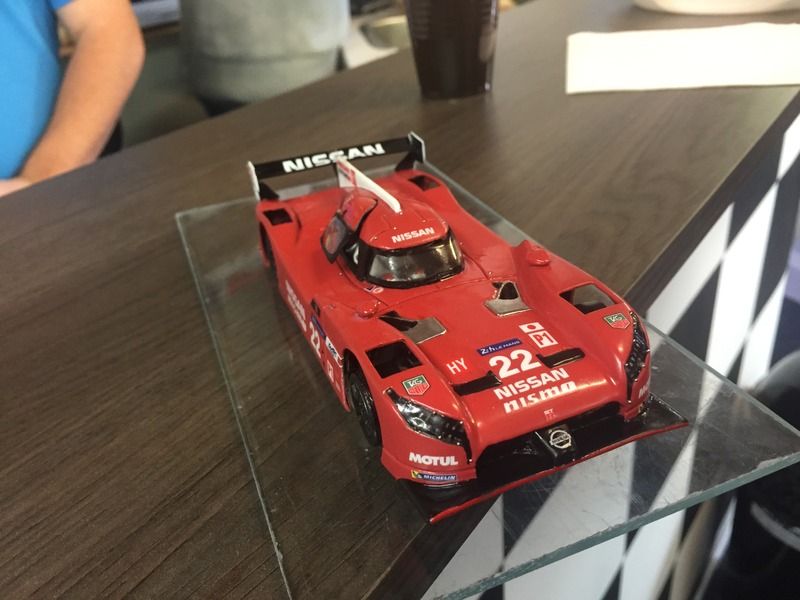
The finished bodies (I had made two as a race and test car) were then primed and sprayed red using rattle cans from Halfords, decanted into my airbrush. Then a coat of lacquer went over the top to smooth the paint before de calling. Unfortunately, the race body paint, reacted strangely to the lacquer, resulting in a dull finish, and also the paint becoming a slightly maroon/pink colour! However with no time to make another or strip the paint off, I had to press on. The test body was not affected by this problem, however the body had been made a little thicker to be stronger and also wasn't as perfect as the race body, so it couldn't be used.
![]()
![]()
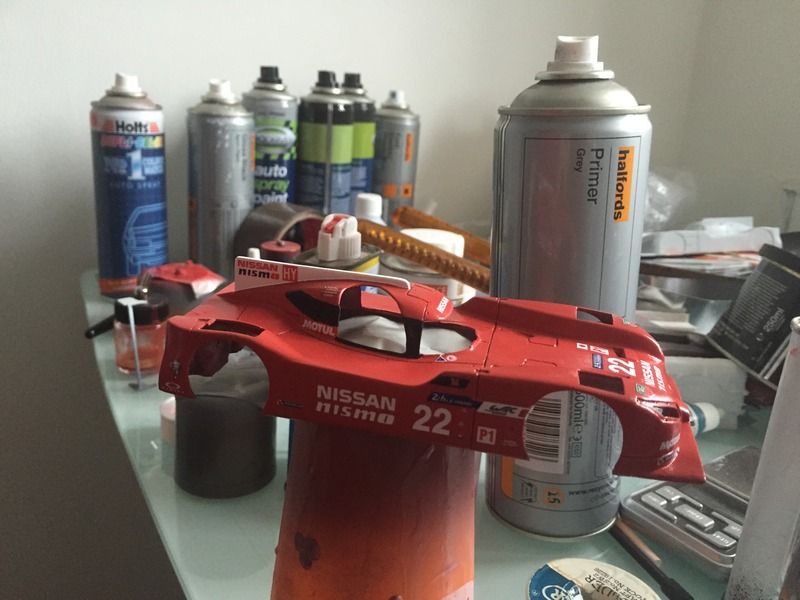
A day later, recalling started. Using the fabulous decals designed by Fola for his 1/24 Nissan, scaled down to 1/32, they went on like a charm in a few hours. These were left overnight to fully dry, then lightly cleaned with a damp tissue to remove any glue residue. Then it was lacquer time. The body had ten light mist coats to seal the decals, and stop them wrinkling. Then it had five thicker coats and left to dry overnight.
![]()
Being careful not to touch the body to put finger marks in the not fully hardened lacquer, I cut the exhaust surrounds using bare metal foil, and also painted by hand the black at the rear of the car, the black around the front louvers, and the splitter section. This was done with Vallejo acrylic black, to my mind the best acrylic paint on the market. It's so heavily pigmented, it covers in one coat, has a lovely sheen, and about 15minutes after painting, a toothpick can be used to remove any excess and neaten. It then dries rock hard within an hour.
![]()
![]()
![]()
Then it was more lacquer, another four thick coats to make sure everything was protected. I stuck it in the airing cupboard for two days to make sure the lacquer had degassed and cured properly.
During this time, the chassis had arrived, and I was very disappointed. The laser cutter had completely charred the fibreglass board, which meant it was covered in a burnt dust which was stubborn to remove from your hands. Also, the thin areas of the chassis, such as where the motorpod fits in the chassis, were damaged, all apart from two of the chassis had split in this location.
So I was obviously annoyed, but with so little time, there was no other immediate option. So I've mixed some Chemical Metal two part glue, and strengthened the weak points using fibre rod, which seemed to the do the trick. However because the chassis was so damaged, areas around the holes for the screws were so weak, they almost screwed straight through! So j had to be real careful, and couldn't adjust anything. Not ideal, but I was praying it would last the six hours.
![]()
![]()
The body was taken out Wednesday morning, two days before we were due to leave for Eindhoven. I firstly fitted all of the rivets and fixed them with a drop of CA. Then I fitted the body mounts, which are small pieces of foam glued to the body, with small plates glued to these which have screw threads tapped in. This was inspired by the fabulous 1/24 scale chassis we so rarely see on this forum. Then the glazing which was affixed with some clear drying flexi glue, and then the borders painted with black Valejo.
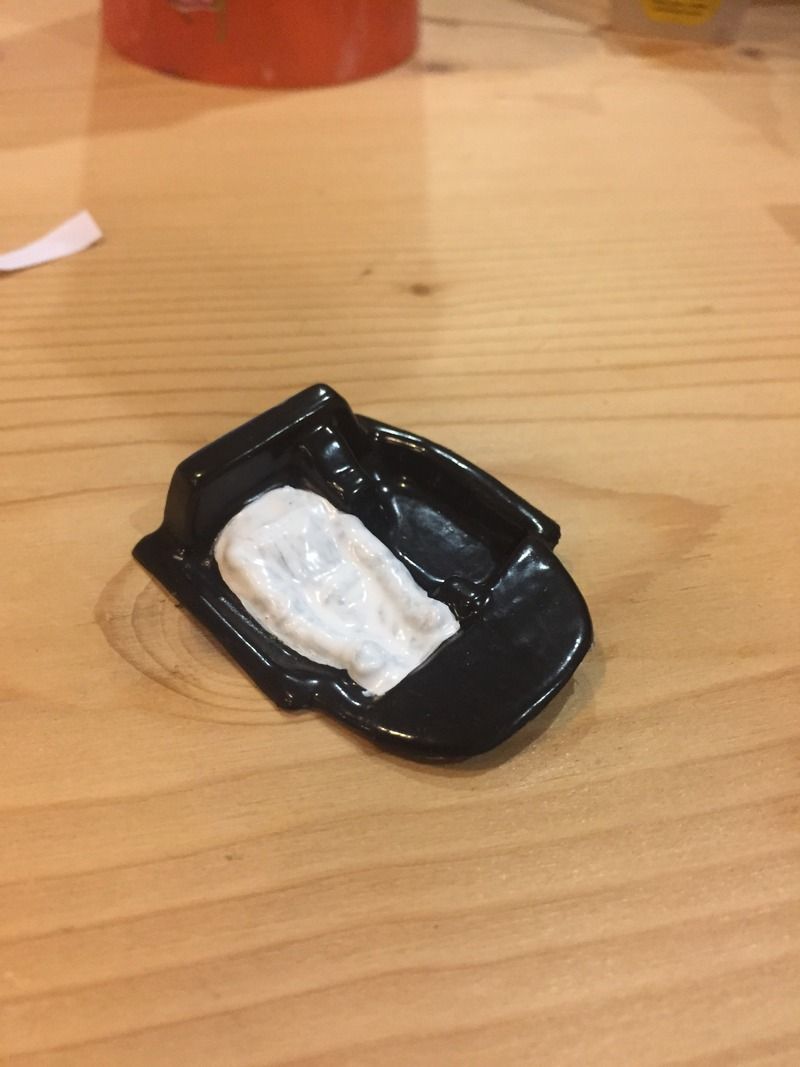
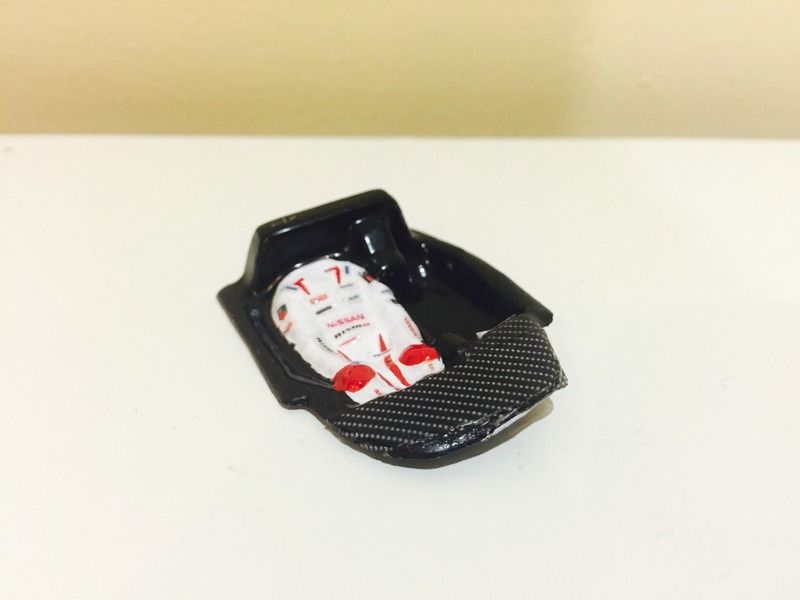
The interior was next. I made a pattern a week or so before using balsa wood, and a Immense Miniatures driver figure cut to size, this was my first vac-form master I had ever made. I then sent this to be vac formed, which came back a few days later. It was cleaned up, and sprayed with grey primer. I then painted the whole thing using black Valejo, and then the driver figure using White Valejo acrylic and his gloves in red.
![]()
A week or so before, I designed and printed decals for the driver figure, comparing the photo of Nissan #22 driver Harry Tinknell in his overalls, and scaling down the logos to fit the driver figure. I also printed off some carbon fibre for extra detail on the cockpit. These decals were all applied,and I must say, looked really awesome! Seat belts were made from masking tape, painted and applied.
![]()
![]()
The steering wheel was a piece of plastic card, cut to shape, and then the holes drilled with a small drill bit for the hand and thumb holes. I painted this black, printed off the dashboard decals, and added additional detail of gear change and clutch paddles, using folded paper, painted black. The steering column was made from one of the scale hardware rivets. The dashboard decal was also from Fola, shrunk to 1/32 and looked real good. I fitted the battery, drinks bottles and also some other bits and pieces which I couldn't identify what they did, all joined together with little strips of fuse wire to simulate tubes and wiring.
The helmet was a Maxi Models item cast in resin. I hollowed out the inside of the helmet, which shaved the weight from 3g to 0.9g, primed, drilled holes for the visor clips and painted copying Tinknell's orange and blue design. Then I added the small Nissan decals around the white band at the top, and lacquered the helmet. The face was painted using Valejo acrylic flesh colour, and added some depth with a wash and lighter and darker skin tones. The white balaclava was also painted, as was the black for the foam on the inside of the helmet.
I made the visor out a strip of packaging, cut the size and two small holes drilled on opposite sides, corresponding to the pivot holes on the helmet. The visor was attached using two rivets on either side, so it moves up and down. The sun strip on the helmet was also painted white and a Nissan decal applied. A lot of this detail couldn't be seen, which was a shame, but I knew it was there![smile.gif]() .
.
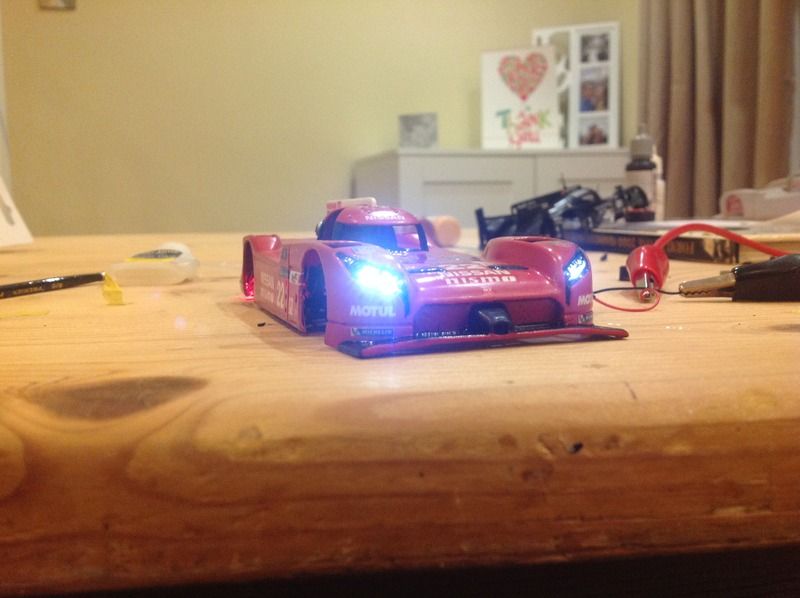
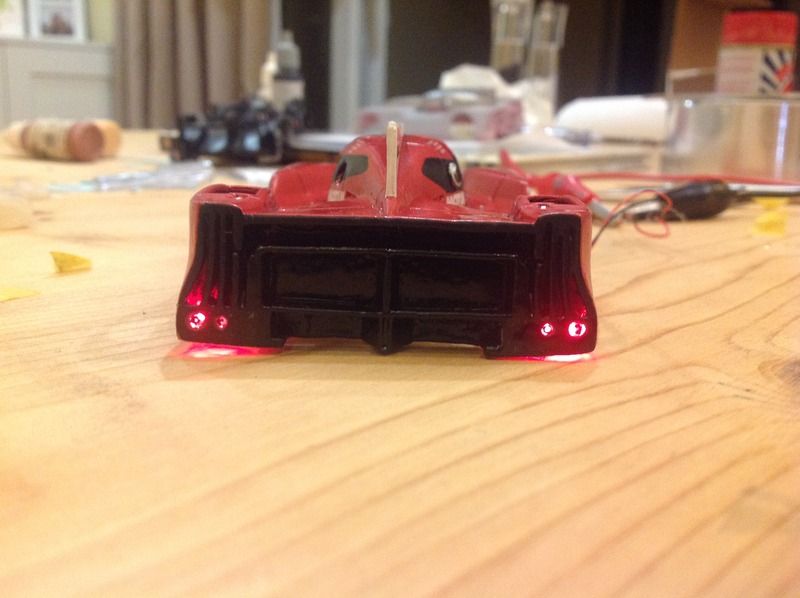
With the interior complete, it was fitted to the body. Then it was the light kit that needed to be fitted. Fola had modified a Z Machine light kit, which gave us four white LEDs up front, four at the rear, six for the position lights on the side, and two for the exhaust flashes. The lights were hot glued into the shell, and the board and battery fitted to one of the side chassis-body connectors.
On the real car, the headlamps are individual LEDs, these were replicated by painting dividing lines on the headlamp glazing.
![]()
![]()
![]()
![]()
Finally, it was fitting the door and the opening mechanism. I used two different widths of very fine brass rod, which when positioned inside each other gave a nice smooth 'hinge'. The internal rod was bent at 90' to fit both inside the door and on the door, and then a small kink at the other end to act as a stopper to stop the door opening too far and also to stop it sliding out of the bigger tube. This was superglued into place to confirm position, then a little dab of hot glue to make it permanent. The door was taped shut whilst it dried, and when removed, the door opened perfectly!
![]() P
P
![]()
![]()
![]()
By now, it was 2am on Friday morning, so I threw my tools in the bag, and the car and spares, and hit bed for two hours of sleep, before getting up at 4am to catch the Eurotunnel. When we arrived in France, Harriet took over the drive to The Hague, which afforded me a few hours to make the final changes, such as fit the wheel inserts, finish the rear wing, and generally get the car presentable.
When we arrived at The Hague, we met up with Alexander my teammate and his lovely wife, and went for a walk from his place, down to the beach front, where we had lunch and a good catch up. We walked back to his, handed over the car to Alex, who would head to Eindhoven for that evenings testing.
![]()
We then headed to Amsterdam for some sightseeing, and then to Eindhoven and the hotel. When Harri was settled, I headed to the club and met up with the boys.
They had seen the state of the chassis, and had spoken with Nick de Wachter of the No Limits Toyota team, who had kindly agreed to make some adjustments and improvements to the original drawing, and cut it overnight on his milling machine! What a guy!
So we tested Alex's Audi R18 on the track so we could learn it and where the changers are, and headed back the hotel. Next morning at 10:30, Nick knocked on my hotel room door, and presented two freshly cut chassis! And nothing was burned![biggrin.gif]() .
.
We were over the moon and so appreciative, so we had breakfast, headed back to Fola's room and started construction. Then we headed to the track and got assembling. This took a few hours, but we had the car running, and headed for dinner at the local Chinese. We had such a laugh, and headed back to the track very contented.
After a little more tweaking we had the Nissan running, until near the end of the evening, we had our digital chip blow, for no visible reason! So we headed back to the hotel, and spent a few hours in Fola's room fitting the new chip, chatting about everything from slot cars to much deeper subjects! In the early hours, I headed back to my room and my VERY understanding wife![smile.gif]() .
.
Sunday morning came, and we headed to the track. The car handled well, so we fiddled with various bits, and had some initial teething troubles which we had hoped to iron out pre event, but with all the delays, it was on the race morning.
We had the car ready to qualify, and it did a reasonable lap time of 10.08 which put us sixth on the grid, in the hands of Alex, who had the most experience on the Eindhoven Suzuka track. Then it was into concours, which saw some really nicely presented models, with Stefan's Porsche 919 3D print, which was completely made from scratch, to Tamar's superb repaint of the NSR Corvette, into Labre Competition colours.
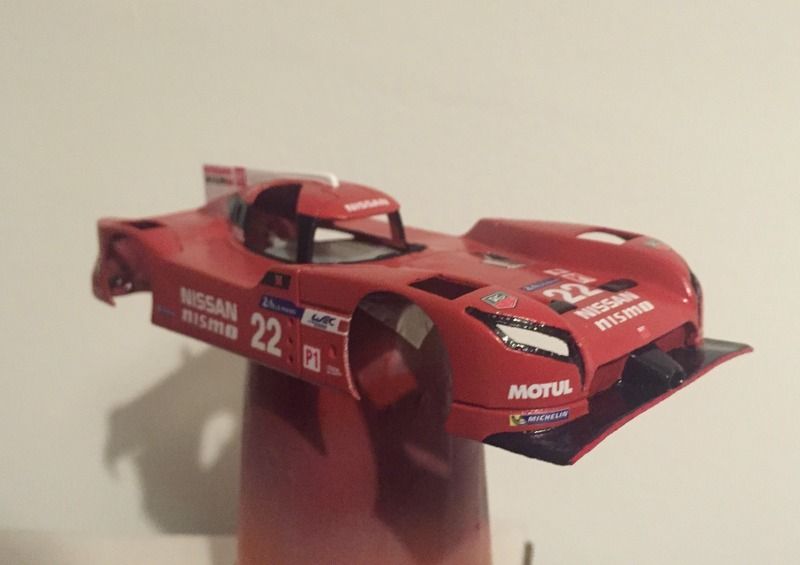
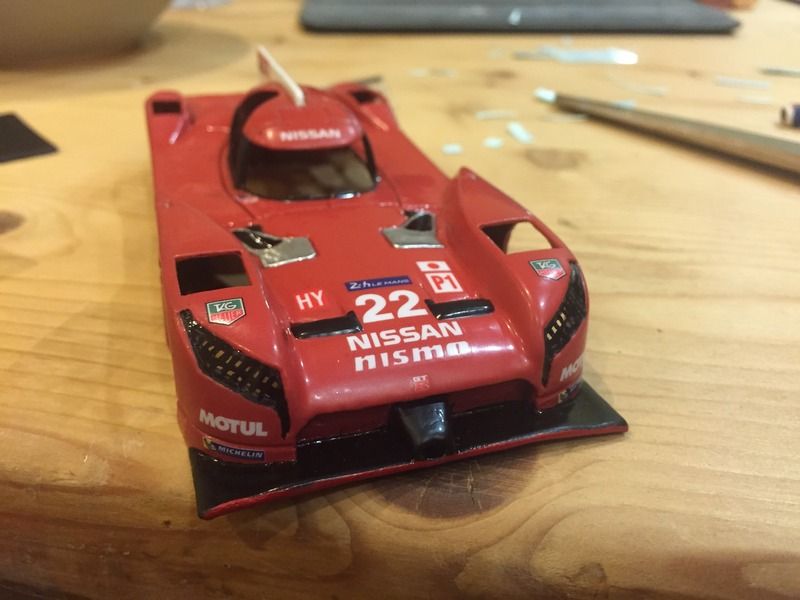
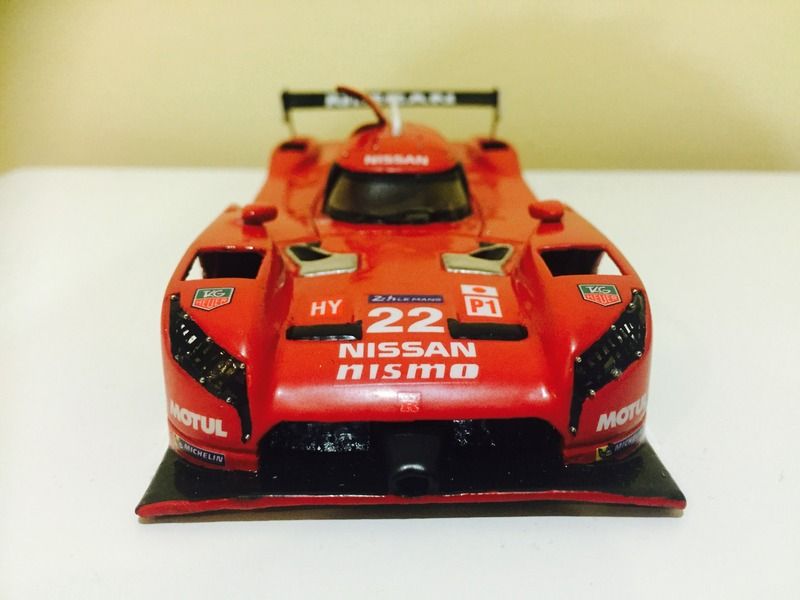
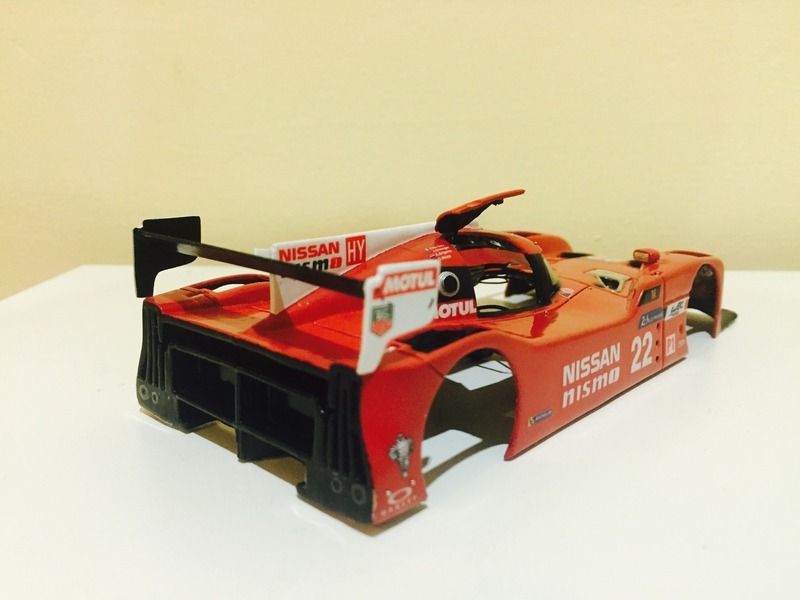
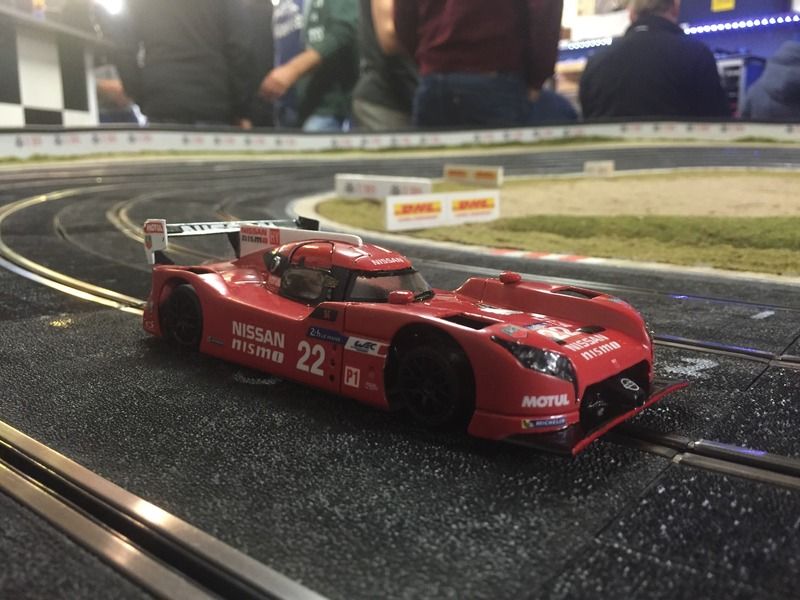
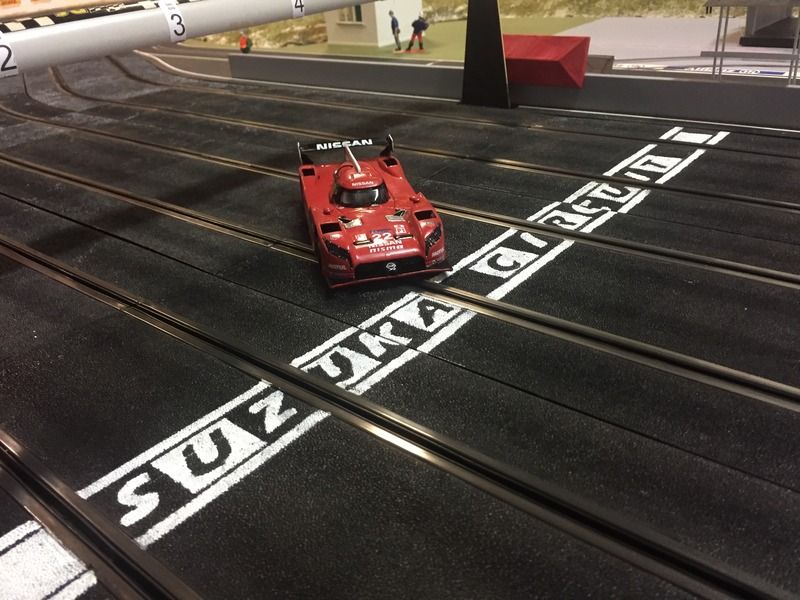
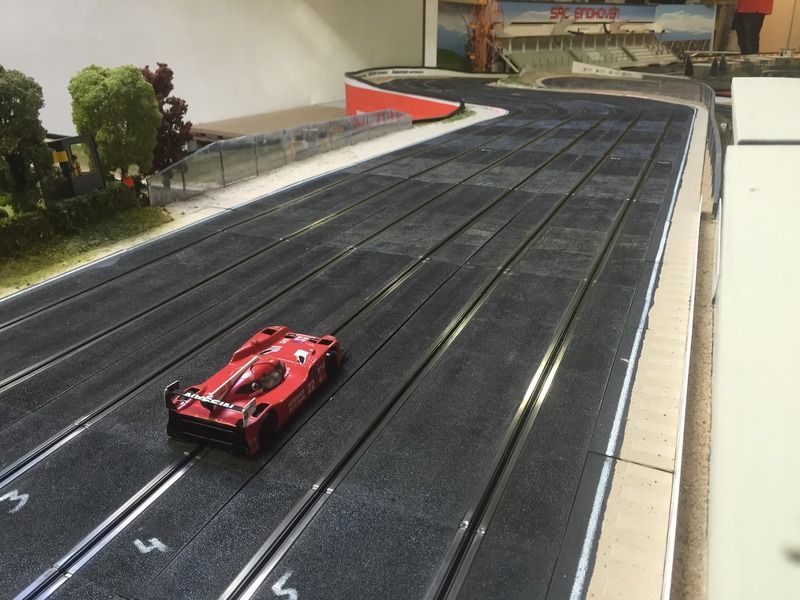
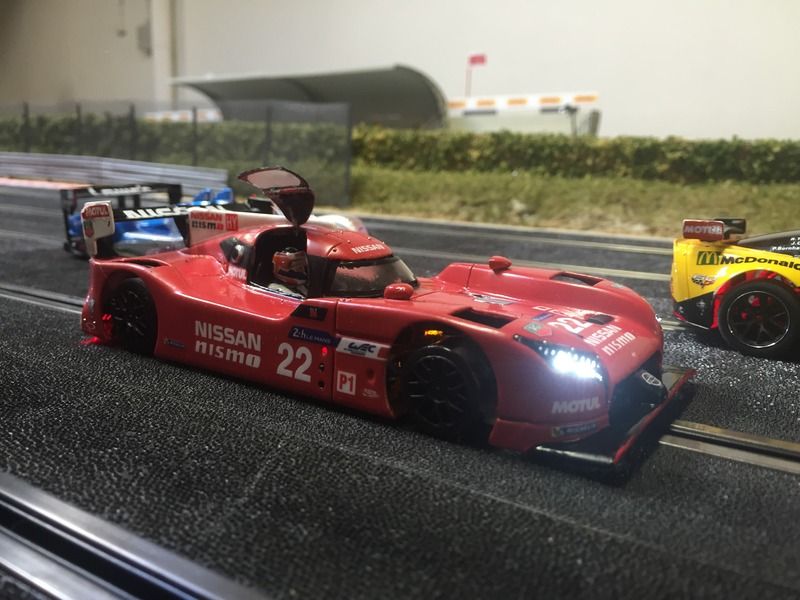
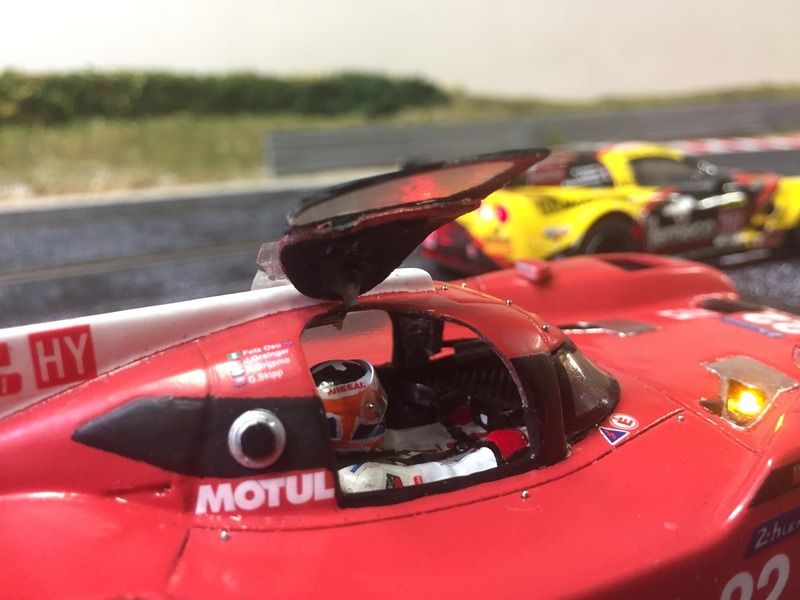
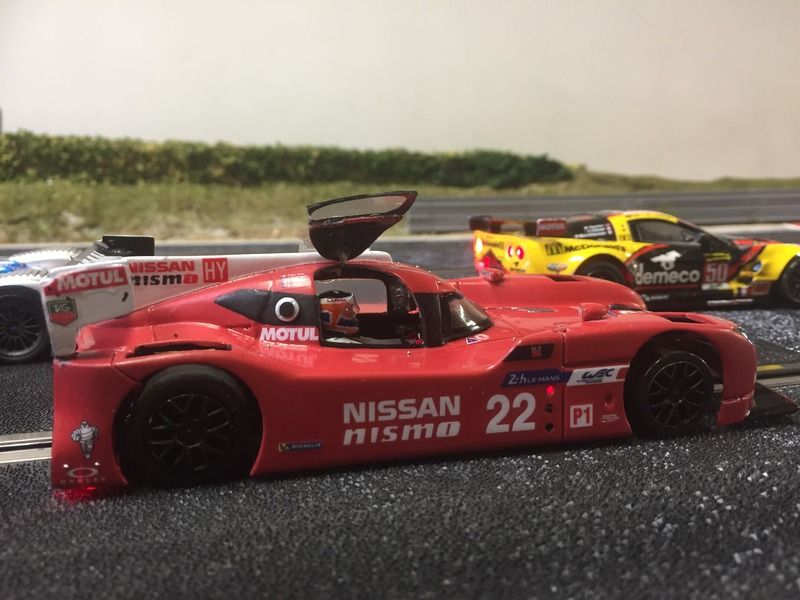
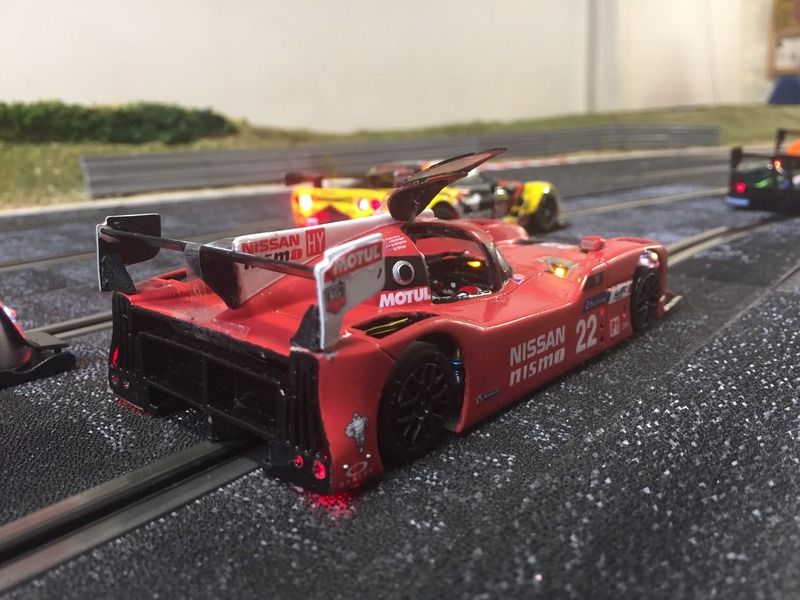
Here are some photos of the car
![]()
![]()
![]()
![]()
![]()
Approaching 130R
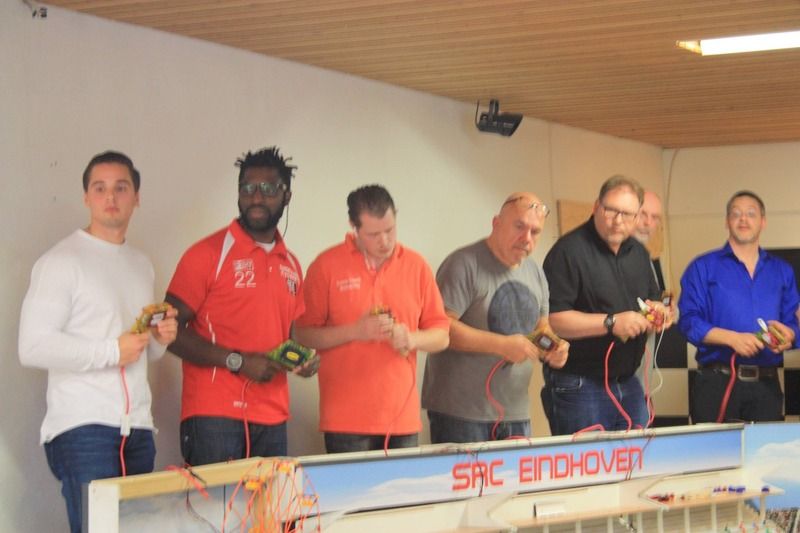
Then, at 12pm, the race started, for six hours. Alex started the car and had a good solid stint, battling for fourth, fifth and sixth with other cars. Gary took over, and we started to get into a rhythm.
Unfortunately in the race, we broke our Surechange Racing guide, at the blade. This has been reported to Richard who is working on a solution for us. We changed over to a slot.it deep wood guide, cut down to fit the Ninco track, which again broke on us with an hour left to go! I've never broken a guide in my near ten years of competitive slot racing, so to have two go in one race was very unusual!
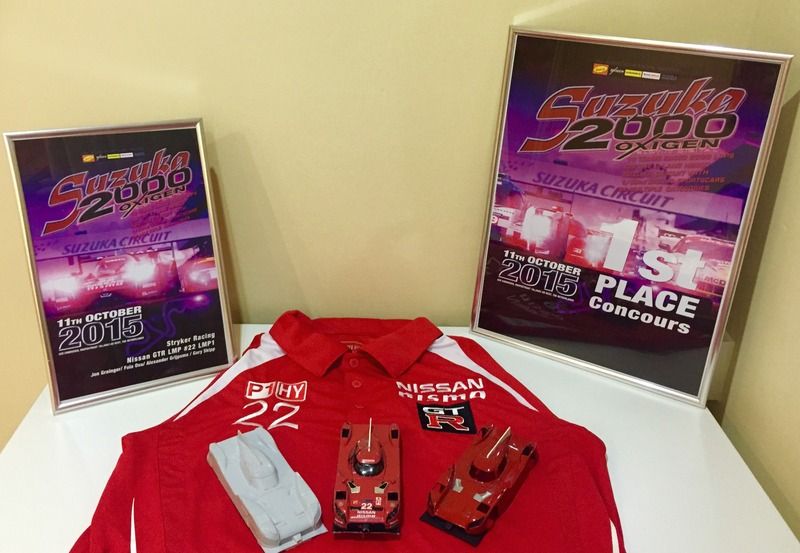
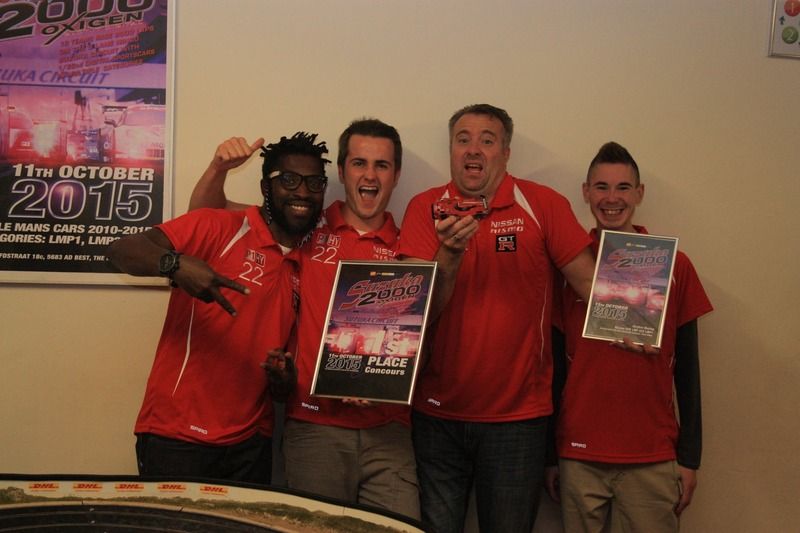
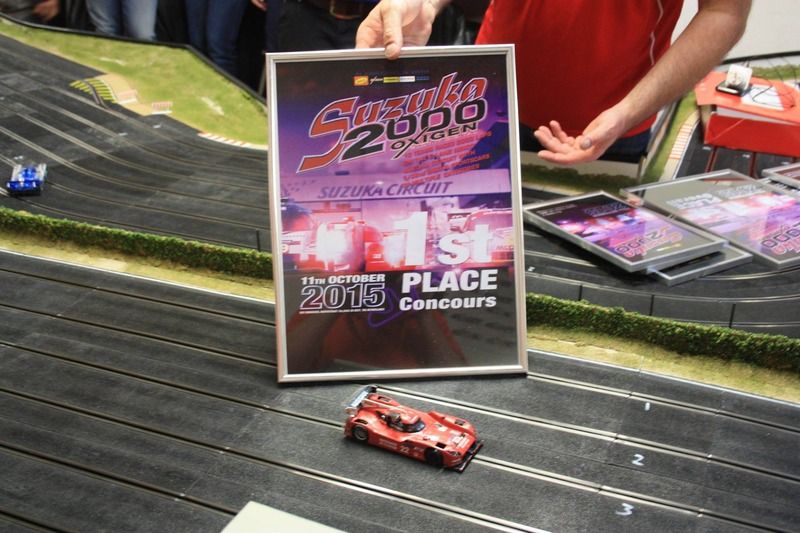
This left us to finish the race in sixth place, and fifth in class. Not a fantastic result, but we learned a hell of a lot which we are going to take into Henley for the 24hours, and be a bit further up the LMP1 grid. However we did win the concours, so it wasn't a wasted trip!
Photos from the concours,
![]()
![]()
![]()
![]()
Finally, thank you to my boys who made up the Stryker Racing with Nismo and SlotFabrik team, they did an awesome job and worked relentlessly all weekend!
![]()
![]()
![]() [/URL
[/URL
[URL=http://s178.photobucket.com/user/ferraif40/media/C4E722BE-F952-433A-BB1F-64BCF409444E.jpg.html]![]()
Christian Schnitzler, Fola Osu, Stefan Kievit and Tamar Nelwan, it's like a who's who of slot racers!
![]()
![]()
![]()
With regards to the bodyshell, I am going to be laminating some new shells for us to test between now and the 24hours, and also the race bodies. Fola has taken on the chassis to evolve and develop the concept, and I will be making improvements to the master and final models to get it looking perfect. We also hope to have some fibreglass kits of the model up for sale in the next months.
I know the paint isn't spot on, but be kind on that! Hope you enjoyed reading the post, and I will be posting a fresh thread closer to the big race with the upgrades we have made (and a better red![wink.gif]() .
.
Regards
Jon
![]()
We wanted to show you a great project that’s been in planning for the last few months-and also keep you updated as work continues.
The story starts on the Monday after the fourth running of the Slot.it oXigen 24hours, on the Le Mans track in Henley in Arden, organised by my good friend’s Gary Skipp and Alex Jones. The race is one of the very best in the world, in my opinion, and has been getting better and better each year.
For the last two years I have been racing along with Tamar Nelwam, and his Racing for Holland squad. In 2014, we raced the Toyota TS030, which was a 1/24 model, scaled down to 1/32, and in 2015 an Aston Martin DBR9 in the GT class, which was one of the fastest cars overall, but got struck by bad luck, realising we never met the full potential. In 2015, one member of Tamar’s team was Alex Grijpma, and we instantly clicked and got on well. It was his first foray into 1/32 racing, having previously raced 1/24 scale cars, exclusively.
Me and Alex started to discuss during one marshalling stint at the race, of entering our own car in the October 2015 oXigen Suzuka 2000 race, at the Eindhoven Slot Race Club, in Holland. Then a full scale attack on the Henley Le Mans 24hrs in 2016. The first Eindhoven race in 2014 was a total success, and had captured my interest. It really is becoming the rehearsal race for the Henley 24hours.
We agreed on the recently announced Nissan GTR-LM Nismo because it is such an interesting car. We even talked about the idea of building a front motored, front wheel drive-spec car, to see if we could mimic the unusual way that Nissan went racing at the real Le Mans in 2015, with varying success.
This type of left-field thinking is a part of the real Le Mans 24 hours, and is quickly becoming a part of the 1/32 version at Henley. This has been showcased in 3D printed bodies, carbon fibre laminated bodies, and even the prototype version of the newly released Slot.it 4WD system, all being raced, twice around the clock every March.
So with the car agreed, we started to think about the body. On the Monday after the race, I purchased some pear-wood, and started to carve a master, in 1.32 scale, using plans I had found on the internet.
However, I then received a FaceTime ‘call’ from another buddy, Fola Osu, legendary 1/24 scale slot car builder, for a catch-up. I mentioned I was working on a Nissan GTR, and low and behold, he turned his phone camera down, to show me a 3D printed Nissan GTR-LM, that he was working on!
So Fola was interested right from the start, and along with Alexander, we started to put a plan into place, so that we could build this model, and have it ready for the Suzuka 2000. Firstly, we purchased a 3D model from an online company, and after much searching, we stumbled upon the incredibly talented Marco Rizzi, owner of the Area 71 Slotcars brand, who’s models have recently become popular due to their unique selling point, making interesting models, and then making every body on a 3D printer. Each model is then post-processed using a unique technology, which leaves them with a glass-smooth finish, much like a resin of GFK kit.
He agreed after some emails and Facebook messages back and forth, to render our 3D model in his software, scale to 1/32 and then print us a model using his usual techniques, which then we could make a silicone moul, and then laminate bodies in GFK. Soon after, he had the first payment instalment, the 3D files, and he started to work his magic!
The rendering of the Nissan GTR LM from Marco
Then, we got hit by our first piece of bad luck. Marco sent the first model using the courier GLS, which was accidentally delivered to another customer of his! So Marco quickly printed another master, which was again sent with GLS, and six weeks later it has not arrived! So a word of advice, do not ever use GLS!
So, Marco printed a THIRD body, and sent it to me using DHL overnight. Unfortunately these delays meant that the master came just two weeks before I was due to leave for Eindhoven! So it was panic stations, and lots of late nights to get the model finished
 .
.
This had a knock on effect with the chassis being cut. I had already designed the chassis for both the front motored, front wheel drive car, and also a more regular rear wheel drive car, using AutoCAD. This was a big challenge for me, having never used this programme before, so I had to learn how to use it, whilst designing the two chassis!
But I wanted to check the measurements of the chassis, when I had the body in my hand, to make sure that everything would fit. Fortunately, everything fitted like a dream, so the designs were sent over to the laser cutter.
Over the next two weeks, I was a whirlwind of hands, silicone, fibreglass and spray paint! The first job was to prepare the master for moulding. The whole car was given a light sand using 2500 grit wet and dry emery paper, to clean up the odd 3D print mark. Then it was mounted to its moulding plinth, and filler applied to close any gaps such as around the wheel arches, grilles and general indents in the body.
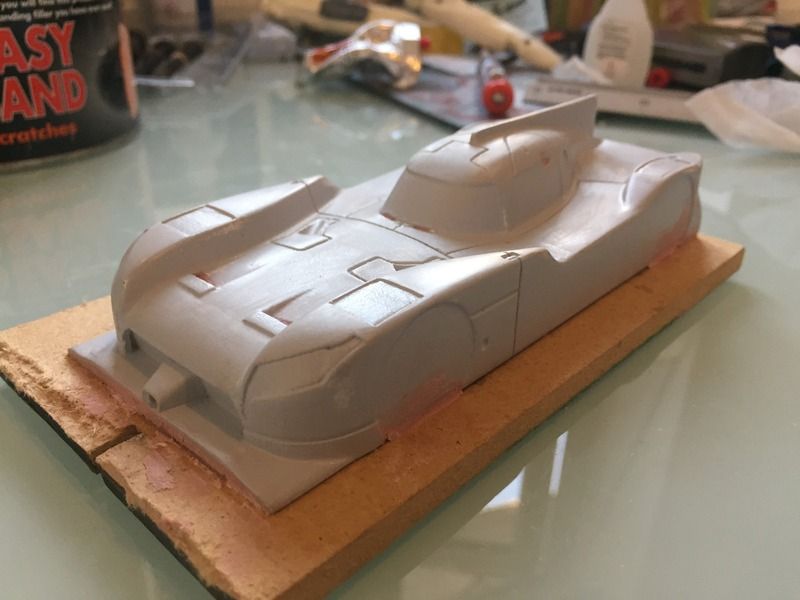
I made a mould box of Lego, to the size of the car. I then mixed the silicone rubber, little at a time, and poured slowly into the mould box. This was left overnight to fully cure, before the demould could take place, and left a perfect mould of the Nissan.
This would be the tricky bit as I had to learn how to laminate a slot car body. A few weeks prior, I had Facetime'd Fola, and he had guided me through the process and recommended the correct products to purchase. These were purchased and I had a few practice runs on another mould I had lying around. I had done a form of laminating with polyurethane resin strengthened with fibreglass on the delicate areas, but a lightweight GFK body was still new.
The first three shells I made weren't the best, and all had to be scrapped. The first I hadn't spread the epoxy resin thick enough (trying to make it light) so there were bits of fibreglass matting showing. The second and third didn't have enough fibreglass matting in, so warped really easily and could not be used.
Fortunately, the well known phrase of 'fourth time lucky'.... Came true! This time I managed to get a nice coat of the resin, and enough fibreglass mat laminated, for the body still to have some performance enhancing flex, but strong enough to demould and endure a six hour race.
So then it was time for clean up. The beauty of using fibreglass means the areas around the glazing can be laminated thinly, so gentle pressure with a scalpel would mean you could remove the excess material very easily, such as around the glazing and wheel recesses.
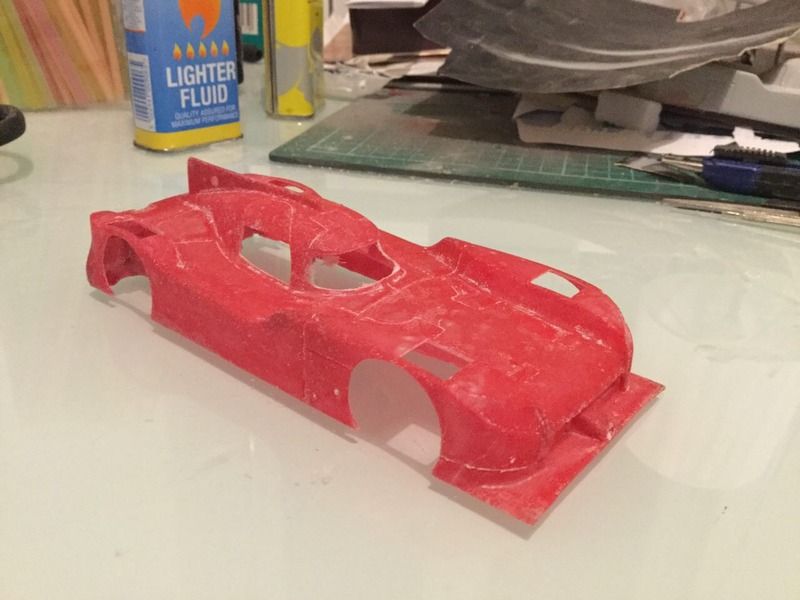
I also drilled the holes for the lights, and also decided to fit real 0.7mm miniature rivets from scale hardware.com. I drilled 35 holes in the body, using a 0.55mm drill bit from a MicroBox, with a pin vice connected to my pillar drill to make sure they'd be straight. Light pressure meant that I didn't break a bit either! I decided to make the drivers door open, so I cut the door out using a sharp scalpel and light pressure.
The finished bodies (I had made two as a race and test car) were then primed and sprayed red using rattle cans from Halfords, decanted into my airbrush. Then a coat of lacquer went over the top to smooth the paint before de calling. Unfortunately, the race body paint, reacted strangely to the lacquer, resulting in a dull finish, and also the paint becoming a slightly maroon/pink colour! However with no time to make another or strip the paint off, I had to press on. The test body was not affected by this problem, however the body had been made a little thicker to be stronger and also wasn't as perfect as the race body, so it couldn't be used.

A day later, recalling started. Using the fabulous decals designed by Fola for his 1/24 Nissan, scaled down to 1/32, they went on like a charm in a few hours. These were left overnight to fully dry, then lightly cleaned with a damp tissue to remove any glue residue. Then it was lacquer time. The body had ten light mist coats to seal the decals, and stop them wrinkling. Then it had five thicker coats and left to dry overnight.
Being careful not to touch the body to put finger marks in the not fully hardened lacquer, I cut the exhaust surrounds using bare metal foil, and also painted by hand the black at the rear of the car, the black around the front louvers, and the splitter section. This was done with Vallejo acrylic black, to my mind the best acrylic paint on the market. It's so heavily pigmented, it covers in one coat, has a lovely sheen, and about 15minutes after painting, a toothpick can be used to remove any excess and neaten. It then dries rock hard within an hour.

Then it was more lacquer, another four thick coats to make sure everything was protected. I stuck it in the airing cupboard for two days to make sure the lacquer had degassed and cured properly.
During this time, the chassis had arrived, and I was very disappointed. The laser cutter had completely charred the fibreglass board, which meant it was covered in a burnt dust which was stubborn to remove from your hands. Also, the thin areas of the chassis, such as where the motorpod fits in the chassis, were damaged, all apart from two of the chassis had split in this location.
So I was obviously annoyed, but with so little time, there was no other immediate option. So I've mixed some Chemical Metal two part glue, and strengthened the weak points using fibre rod, which seemed to the do the trick. However because the chassis was so damaged, areas around the holes for the screws were so weak, they almost screwed straight through! So j had to be real careful, and couldn't adjust anything. Not ideal, but I was praying it would last the six hours.
The body was taken out Wednesday morning, two days before we were due to leave for Eindhoven. I firstly fitted all of the rivets and fixed them with a drop of CA. Then I fitted the body mounts, which are small pieces of foam glued to the body, with small plates glued to these which have screw threads tapped in. This was inspired by the fabulous 1/24 scale chassis we so rarely see on this forum. Then the glazing which was affixed with some clear drying flexi glue, and then the borders painted with black Valejo.
The interior was next. I made a pattern a week or so before using balsa wood, and a Immense Miniatures driver figure cut to size, this was my first vac-form master I had ever made. I then sent this to be vac formed, which came back a few days later. It was cleaned up, and sprayed with grey primer. I then painted the whole thing using black Valejo, and then the driver figure using White Valejo acrylic and his gloves in red.
A week or so before, I designed and printed decals for the driver figure, comparing the photo of Nissan #22 driver Harry Tinknell in his overalls, and scaling down the logos to fit the driver figure. I also printed off some carbon fibre for extra detail on the cockpit. These decals were all applied,and I must say, looked really awesome! Seat belts were made from masking tape, painted and applied.

The steering wheel was a piece of plastic card, cut to shape, and then the holes drilled with a small drill bit for the hand and thumb holes. I painted this black, printed off the dashboard decals, and added additional detail of gear change and clutch paddles, using folded paper, painted black. The steering column was made from one of the scale hardware rivets. The dashboard decal was also from Fola, shrunk to 1/32 and looked real good. I fitted the battery, drinks bottles and also some other bits and pieces which I couldn't identify what they did, all joined together with little strips of fuse wire to simulate tubes and wiring.
The helmet was a Maxi Models item cast in resin. I hollowed out the inside of the helmet, which shaved the weight from 3g to 0.9g, primed, drilled holes for the visor clips and painted copying Tinknell's orange and blue design. Then I added the small Nissan decals around the white band at the top, and lacquered the helmet. The face was painted using Valejo acrylic flesh colour, and added some depth with a wash and lighter and darker skin tones. The white balaclava was also painted, as was the black for the foam on the inside of the helmet.
I made the visor out a strip of packaging, cut the size and two small holes drilled on opposite sides, corresponding to the pivot holes on the helmet. The visor was attached using two rivets on either side, so it moves up and down. The sun strip on the helmet was also painted white and a Nissan decal applied. A lot of this detail couldn't be seen, which was a shame, but I knew it was there
.With the interior complete, it was fitted to the body. Then it was the light kit that needed to be fitted. Fola had modified a Z Machine light kit, which gave us four white LEDs up front, four at the rear, six for the position lights on the side, and two for the exhaust flashes. The lights were hot glued into the shell, and the board and battery fitted to one of the side chassis-body connectors.
On the real car, the headlamps are individual LEDs, these were replicated by painting dividing lines on the headlamp glazing.

Finally, it was fitting the door and the opening mechanism. I used two different widths of very fine brass rod, which when positioned inside each other gave a nice smooth 'hinge'. The internal rod was bent at 90' to fit both inside the door and on the door, and then a small kink at the other end to act as a stopper to stop the door opening too far and also to stop it sliding out of the bigger tube. This was superglued into place to confirm position, then a little dab of hot glue to make it permanent. The door was taped shut whilst it dried, and when removed, the door opened perfectly!
 P
P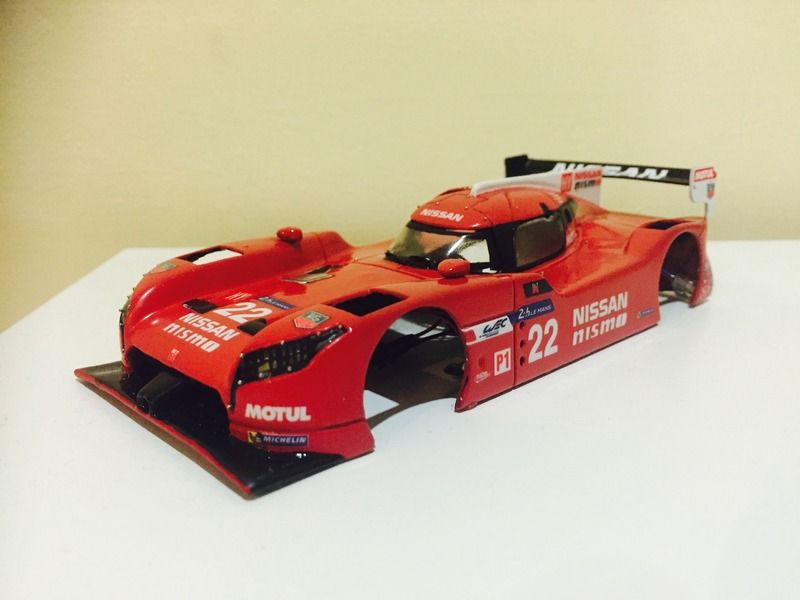
By now, it was 2am on Friday morning, so I threw my tools in the bag, and the car and spares, and hit bed for two hours of sleep, before getting up at 4am to catch the Eurotunnel. When we arrived in France, Harriet took over the drive to The Hague, which afforded me a few hours to make the final changes, such as fit the wheel inserts, finish the rear wing, and generally get the car presentable.
When we arrived at The Hague, we met up with Alexander my teammate and his lovely wife, and went for a walk from his place, down to the beach front, where we had lunch and a good catch up. We walked back to his, handed over the car to Alex, who would head to Eindhoven for that evenings testing.
We then headed to Amsterdam for some sightseeing, and then to Eindhoven and the hotel. When Harri was settled, I headed to the club and met up with the boys.
They had seen the state of the chassis, and had spoken with Nick de Wachter of the No Limits Toyota team, who had kindly agreed to make some adjustments and improvements to the original drawing, and cut it overnight on his milling machine! What a guy!
So we tested Alex's Audi R18 on the track so we could learn it and where the changers are, and headed back the hotel. Next morning at 10:30, Nick knocked on my hotel room door, and presented two freshly cut chassis! And nothing was burned
 .
.We were over the moon and so appreciative, so we had breakfast, headed back to Fola's room and started construction. Then we headed to the track and got assembling. This took a few hours, but we had the car running, and headed for dinner at the local Chinese. We had such a laugh, and headed back to the track very contented.
After a little more tweaking we had the Nissan running, until near the end of the evening, we had our digital chip blow, for no visible reason! So we headed back to the hotel, and spent a few hours in Fola's room fitting the new chip, chatting about everything from slot cars to much deeper subjects! In the early hours, I headed back to my room and my VERY understanding wife
.Sunday morning came, and we headed to the track. The car handled well, so we fiddled with various bits, and had some initial teething troubles which we had hoped to iron out pre event, but with all the delays, it was on the race morning.
We had the car ready to qualify, and it did a reasonable lap time of 10.08 which put us sixth on the grid, in the hands of Alex, who had the most experience on the Eindhoven Suzuka track. Then it was into concours, which saw some really nicely presented models, with Stefan's Porsche 919 3D print, which was completely made from scratch, to Tamar's superb repaint of the NSR Corvette, into Labre Competition colours.
Here are some photos of the car

Approaching 130R
Then, at 12pm, the race started, for six hours. Alex started the car and had a good solid stint, battling for fourth, fifth and sixth with other cars. Gary took over, and we started to get into a rhythm.
Unfortunately in the race, we broke our Surechange Racing guide, at the blade. This has been reported to Richard who is working on a solution for us. We changed over to a slot.it deep wood guide, cut down to fit the Ninco track, which again broke on us with an hour left to go! I've never broken a guide in my near ten years of competitive slot racing, so to have two go in one race was very unusual!
This left us to finish the race in sixth place, and fifth in class. Not a fantastic result, but we learned a hell of a lot which we are going to take into Henley for the 24hours, and be a bit further up the LMP1 grid. However we did win the concours, so it wasn't a wasted trip!
Photos from the concours,
Finally, thank you to my boys who made up the Stryker Racing with Nismo and SlotFabrik team, they did an awesome job and worked relentlessly all weekend!
 [/URL
[/URL[URL=http://s178.photobucket.com/user/ferraif40/media/C4E722BE-F952-433A-BB1F-64BCF409444E.jpg.html]
Christian Schnitzler, Fola Osu, Stefan Kievit and Tamar Nelwan, it's like a who's who of slot racers!

With regards to the bodyshell, I am going to be laminating some new shells for us to test between now and the 24hours, and also the race bodies. Fola has taken on the chassis to evolve and develop the concept, and I will be making improvements to the master and final models to get it looking perfect. We also hope to have some fibreglass kits of the model up for sale in the next months.
I know the paint isn't spot on, but be kind on that! Hope you enjoyed reading the post, and I will be posting a fresh thread closer to the big race with the upgrades we have made (and a better red
 .
.Regards
Jon