The Silken Purse Project
Building a Silk Purse out of a Sow's Ear
You may want to get yourself a coffee for this - it's a full build story with 28 photos.
Pantyffynnon Slot Car Club has run a Le Mans/Endurance class since it started and it's our only unlimited class. We keep a cap on other classes so novices can get a competitive car, including chip, for under £40 (sometimes under £30). A gentlemen's agreement previously saw a spending cap on Le Mans of £60 but that was waived for 2014. We only ran it for the first half of 2015 and then parked it for a breather.
But now it's back and I thought I would try something a little different.
I won the 2015 series with my Slot.It GT40 - it won all but one of the Le Mans Seasons (losing to NSR Moslers) so I fancied a change. The GT40 has been passed on to our newest club member at a fraction of its build cost and I set myself the challenge of building a competitive car for a reasonable price.
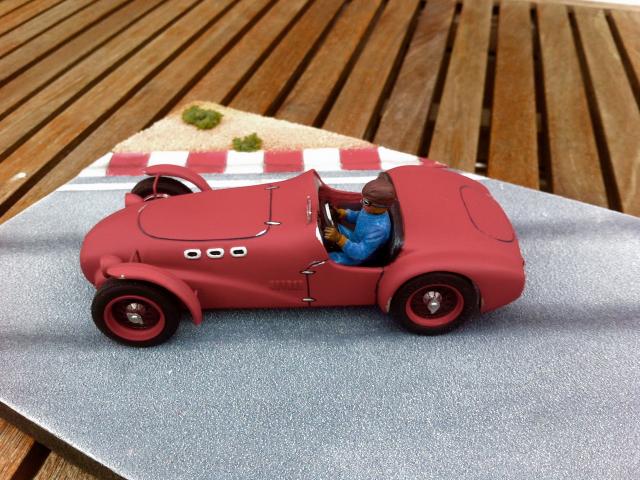
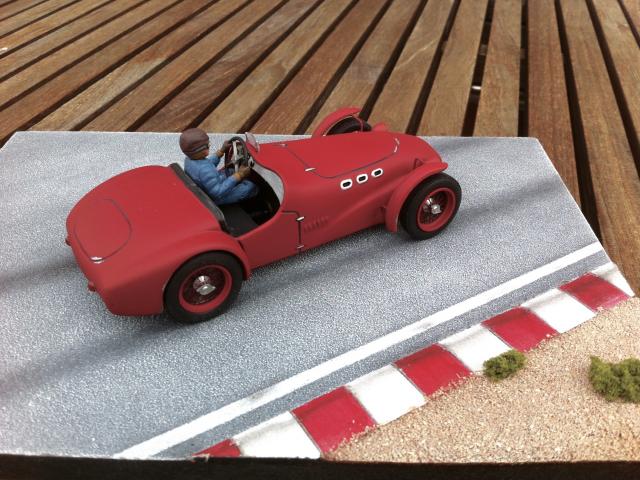
Here's the old GT40 - the "Flying Banana". Looking a little worse for wear in the body department but devastatingly quick with its NSR Shark 25k motor and capable of lapping the Amman Valley Raceway magless in under 7.8 seconds.
![]()
![]()
![]()
So what should replace the old girl?
Everybody is steering clear of NSR Moslers and there seems to be a trend towards a very wide variety of manufacturers - Scaleauto, NSR, Slot.It, Avant Slot, Sloter, Fly etc. So the obvious choice for me was......
Scalextric.
We have a saying in the English-Speaking world, first published in 1579!!!, that you can't make a silk purse from a sow's ear (sow being female pig). Meaning that you cannot make something good from something that is bad.
So here's my Pig's Ear, sorry, sow's ear...
![]()
Our class is for Endurance cars - anything with an enclosed wheel that has run in Le Mans, Sebring, Daytona and other similar endurance races. We also allow the Scalextric START Endurance cars because they are cheap and they look very similar to so many of the LMP cars.
![]()
This particular car cost me £6 (about USD 9) used and complete with naff decals.
![]()
The rear axle is missing because I stole it for another project.
Actually it's not a bad looking car, it looks the part and its cheap because there are no royalties payable because it's not a copy of a real car. There are obvious design cues from Peugeot, Audi, Lola etc.
![]()
Inside there is plenty of space for a digital chip and all its associated wiring. The "glass" is even removable for anybody wanting to do a respray.
![]()
The chassis is quite interesting - it's very low and flat with some stiffening members running from the guide surround right back to the motor. No motor pod but as I always run my motor pods tight that's not a backwards step as far as our track and my driving style is concerned.
But to run this car competitively it needs more than the standard 18k Mabuchi and stock Scaley gears. Time to upgrade - but on the cheap...
A couple of years ago Scalextric must have had a clear-out and offloaded its Sport range of running gear onto the market. It's actually good quality stuff BUT they went with a 3mm axle which instantly doomed it. However the axle bushes are the same outside dimensions which means it's a straight swap into any Scalextric car.
More to the point I bought a load of this stock at stupid low prices. Four alloy wheels complete with tyres cost me £4 - can't argue with that. Sport tyres are actually VERY grippy on Sport track - ideal for my purposes.
![]()
As to motive power - as my old GT40 will be racing in the hands of a novice who is proving to be quite fast I need to at least match it's Shark 25k motor. But this build is longer, wider and probably heavier so there's only one thing for it...
![]()
The Shark 30k (there's a backup 25k if needed) and a suitable brass pinion.
Top Slots N Trains are selling the Sharks for £9.95 at the moment and I picked up Slot.It 8, 9, 10 and 11 tooth pinions at Gaydon for £3.50 the lot brand new.
So I'm doing OK at keeping the costs down - no point spending more than a Slot.It with a chip and motor upgrade.
And so to work - cleaning up the body...
![]()
Stripping and cleaning the chassis...
![]()
And running-in the motor...
![]()
The standard car uses standard Scaley gears and, being a very low LMP style car the gear enclosure is very tight to the gears so I needed to get out the Dremel and make space in the chassis for my larger contrate gear...
![]()
Next step was to fit the brass pinion to the motor using my home-made pinion press.
![]()
Then shove in the rear axle assembly complete with ball race bearings.
![]()
As our track is very technical with two hairpins and a series of R2 esses I went with the loweest possible gearing - an 8 tooth pinion and a 29 tooth gear. The Slot.It pinion meshes very well with the Scaley Sport gear and I managed to get zero axle slop without any tightness - it's satisfyingly smooth.
As I am fitting similar but narrower wheels up front I was able to fit these to the rear and true them - which I did BEFORE I fitted the chip (no need to stress the chip and blow it before it races for real).
![]()
The front axle mount is a simple retaining ring. I don't know if this will be good enough for racing but I reamed it out to just over 3mm, greased the rings and fitted the axle. If it proves a bad idea I can always fabricate new mounts later. Ride height is correct so I didn't have to take anything off the front tyres which didn't need much truing anyway.
So here's the running chassis...
![]()
Now came the fun and games....
The body didn't fit. Not surprising given the massive contrate. So I had to butcher the body shell - amazingly the main gear had clearance, even though I have gone much larger, but the shoulders for the grub screw fixings were fouling meaning some careful surgery...
![]()
Next the small matter of fitting the SureChange guide with on-board LED and the GregK mega upgraded chip with uprated diodes and mosfet. Although the Start cars are fitted with a quick-change braid system the guide is a push-fit not a screw-in like most current Scalextric cars. The SureChange SPORT does fit - the shaft is the perfect length, but the hole needs to be reamed out a little as the push fit version doesn't have a stepped shaft like the screw-in guides.
![]()
As usual I refitted the LED with guide wire because the standard fly lead wire is too thin and stiff.
Guide wires are fixed with M2 grub screws and the ferrite man is midway between the guide and the chip with its twin brother on the motor.
As you can see - the motor is hot-glued in. That's because when I trued the tyres (I connected my variable PSU direct to the motor to do that) the motor kept climbing out of its mount when the tyres started to grip on the sanding block. Can't have the motor popping out under hard acceleration so out came the hot glue gun.
![]()
Interestingly the Shark is a little fatter than the Scaley Mabuchi and I had to remove some of the vent slats to make it sit properly in its mount before gluing it in place.
So here it is - the nose is high because I wasn't going to cut a slot in my desk just to take a photo!!!
![]()
![]()
And the final touch - giving it some visual interest....
![]()
![]()
![]()
I went with a flames theme in tribute to our new club logo (designed by mcewan).
So now it needs to be raced in anger to see how it measures up against the competition.
All in this car has cost me £46. Quite a lot - but not when you consider a Slot.It white kit would cost £40 plus £17 for a chip plus £10 to upgrade the motor to 30k. My car works out at 2/3 the price - let's hope the lap times aren't 1/3 slower!!!
So that's my attempt a making a silk purse from a sow's ear.
I will report back after our first race next week. Then I will know if I have built a competitive racer...
![]()
.. or find out that, after all my efforts and fancy running gear, underneath it is still...
![]()
... a pig![blink.gif]()
Building a Silk Purse out of a Sow's Ear
You may want to get yourself a coffee for this - it's a full build story with 28 photos.
Pantyffynnon Slot Car Club has run a Le Mans/Endurance class since it started and it's our only unlimited class. We keep a cap on other classes so novices can get a competitive car, including chip, for under £40 (sometimes under £30). A gentlemen's agreement previously saw a spending cap on Le Mans of £60 but that was waived for 2014. We only ran it for the first half of 2015 and then parked it for a breather.
But now it's back and I thought I would try something a little different.
I won the 2015 series with my Slot.It GT40 - it won all but one of the Le Mans Seasons (losing to NSR Moslers) so I fancied a change. The GT40 has been passed on to our newest club member at a fraction of its build cost and I set myself the challenge of building a competitive car for a reasonable price.
Here's the old GT40 - the "Flying Banana". Looking a little worse for wear in the body department but devastatingly quick with its NSR Shark 25k motor and capable of lapping the Amman Valley Raceway magless in under 7.8 seconds.


So what should replace the old girl?
Everybody is steering clear of NSR Moslers and there seems to be a trend towards a very wide variety of manufacturers - Scaleauto, NSR, Slot.It, Avant Slot, Sloter, Fly etc. So the obvious choice for me was......
Scalextric.
We have a saying in the English-Speaking world, first published in 1579!!!, that you can't make a silk purse from a sow's ear (sow being female pig). Meaning that you cannot make something good from something that is bad.
So here's my Pig's Ear, sorry, sow's ear...

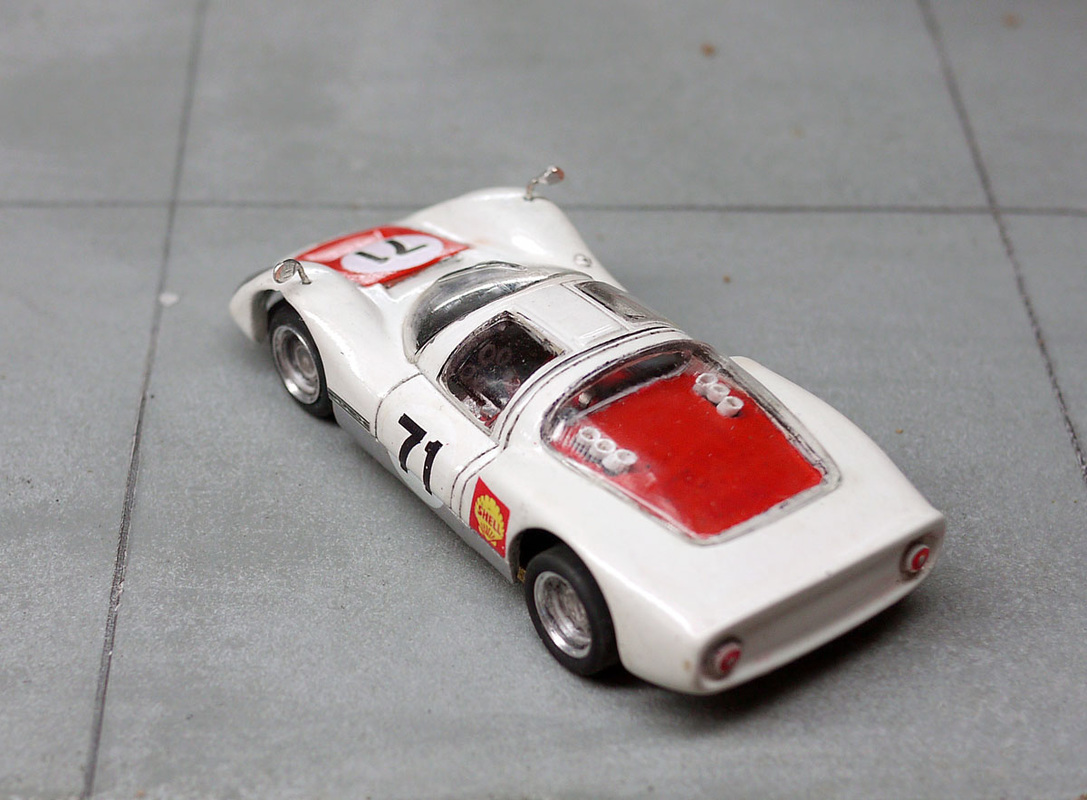
Our class is for Endurance cars - anything with an enclosed wheel that has run in Le Mans, Sebring, Daytona and other similar endurance races. We also allow the Scalextric START Endurance cars because they are cheap and they look very similar to so many of the LMP cars.

This particular car cost me £6 (about USD 9) used and complete with naff decals.

The rear axle is missing because I stole it for another project.
Actually it's not a bad looking car, it looks the part and its cheap because there are no royalties payable because it's not a copy of a real car. There are obvious design cues from Peugeot, Audi, Lola etc.

Inside there is plenty of space for a digital chip and all its associated wiring. The "glass" is even removable for anybody wanting to do a respray.

The chassis is quite interesting - it's very low and flat with some stiffening members running from the guide surround right back to the motor. No motor pod but as I always run my motor pods tight that's not a backwards step as far as our track and my driving style is concerned.
But to run this car competitively it needs more than the standard 18k Mabuchi and stock Scaley gears. Time to upgrade - but on the cheap...
A couple of years ago Scalextric must have had a clear-out and offloaded its Sport range of running gear onto the market. It's actually good quality stuff BUT they went with a 3mm axle which instantly doomed it. However the axle bushes are the same outside dimensions which means it's a straight swap into any Scalextric car.
More to the point I bought a load of this stock at stupid low prices. Four alloy wheels complete with tyres cost me £4 - can't argue with that. Sport tyres are actually VERY grippy on Sport track - ideal for my purposes.

As to motive power - as my old GT40 will be racing in the hands of a novice who is proving to be quite fast I need to at least match it's Shark 25k motor. But this build is longer, wider and probably heavier so there's only one thing for it...

The Shark 30k (there's a backup 25k if needed) and a suitable brass pinion.
Top Slots N Trains are selling the Sharks for £9.95 at the moment and I picked up Slot.It 8, 9, 10 and 11 tooth pinions at Gaydon for £3.50 the lot brand new.
So I'm doing OK at keeping the costs down - no point spending more than a Slot.It with a chip and motor upgrade.
And so to work - cleaning up the body...

Stripping and cleaning the chassis...

And running-in the motor...

The standard car uses standard Scaley gears and, being a very low LMP style car the gear enclosure is very tight to the gears so I needed to get out the Dremel and make space in the chassis for my larger contrate gear...

Next step was to fit the brass pinion to the motor using my home-made pinion press.

Then shove in the rear axle assembly complete with ball race bearings.

As our track is very technical with two hairpins and a series of R2 esses I went with the loweest possible gearing - an 8 tooth pinion and a 29 tooth gear. The Slot.It pinion meshes very well with the Scaley Sport gear and I managed to get zero axle slop without any tightness - it's satisfyingly smooth.
As I am fitting similar but narrower wheels up front I was able to fit these to the rear and true them - which I did BEFORE I fitted the chip (no need to stress the chip and blow it before it races for real).

The front axle mount is a simple retaining ring. I don't know if this will be good enough for racing but I reamed it out to just over 3mm, greased the rings and fitted the axle. If it proves a bad idea I can always fabricate new mounts later. Ride height is correct so I didn't have to take anything off the front tyres which didn't need much truing anyway.
So here's the running chassis...

Now came the fun and games....
The body didn't fit. Not surprising given the massive contrate. So I had to butcher the body shell - amazingly the main gear had clearance, even though I have gone much larger, but the shoulders for the grub screw fixings were fouling meaning some careful surgery...

Next the small matter of fitting the SureChange guide with on-board LED and the GregK mega upgraded chip with uprated diodes and mosfet. Although the Start cars are fitted with a quick-change braid system the guide is a push-fit not a screw-in like most current Scalextric cars. The SureChange SPORT does fit - the shaft is the perfect length, but the hole needs to be reamed out a little as the push fit version doesn't have a stepped shaft like the screw-in guides.

As usual I refitted the LED with guide wire because the standard fly lead wire is too thin and stiff.
Guide wires are fixed with M2 grub screws and the ferrite man is midway between the guide and the chip with its twin brother on the motor.
As you can see - the motor is hot-glued in. That's because when I trued the tyres (I connected my variable PSU direct to the motor to do that) the motor kept climbing out of its mount when the tyres started to grip on the sanding block. Can't have the motor popping out under hard acceleration so out came the hot glue gun.

Interestingly the Shark is a little fatter than the Scaley Mabuchi and I had to remove some of the vent slats to make it sit properly in its mount before gluing it in place.
So here it is - the nose is high because I wasn't going to cut a slot in my desk just to take a photo!!!


And the final touch - giving it some visual interest....


I went with a flames theme in tribute to our new club logo (designed by mcewan).
So now it needs to be raced in anger to see how it measures up against the competition.
All in this car has cost me £46. Quite a lot - but not when you consider a Slot.It white kit would cost £40 plus £17 for a chip plus £10 to upgrade the motor to 30k. My car works out at 2/3 the price - let's hope the lap times aren't 1/3 slower!!!
So that's my attempt a making a silk purse from a sow's ear.
I will report back after our first race next week. Then I will know if I have built a competitive racer...

.. or find out that, after all my efforts and fancy running gear, underneath it is still...

... a pig

 Sorry about that.


 [/url]


